10 Tips to Use Gradle With IntelliJ IDEA in 2022

If you're building Gradle projects in IntelliJ IDEA, you're probably not using the IDE to its full advantage. So to help you save time and avoid unnecessary work, here are my top 10 tips to working like a pro.
1) Create Gradle project using IntelliJ IDEA
First off, use IntelliJ IDEA it to create new Gradle projects.
From the Welcome to IntelliJ IDEA screen select New Project to open the New Project dialog.
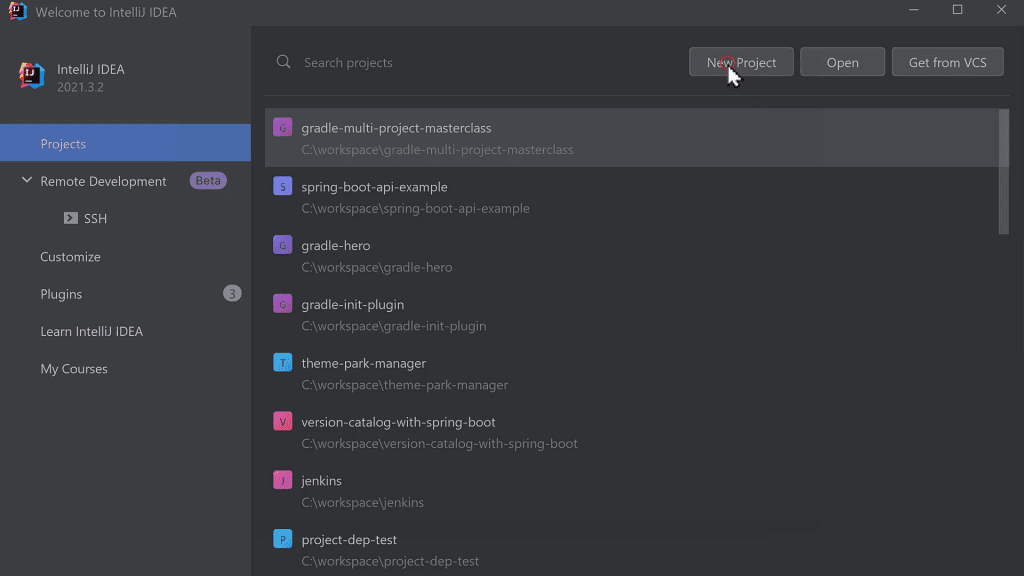
Or in the Main menu go to File > New > Project.
Make sure Gradle is selected, choose a Project SDK, check the box if you want to use Kotlin build scripts, and select what type of project you want.
We'll choose Java and see how that effects things.
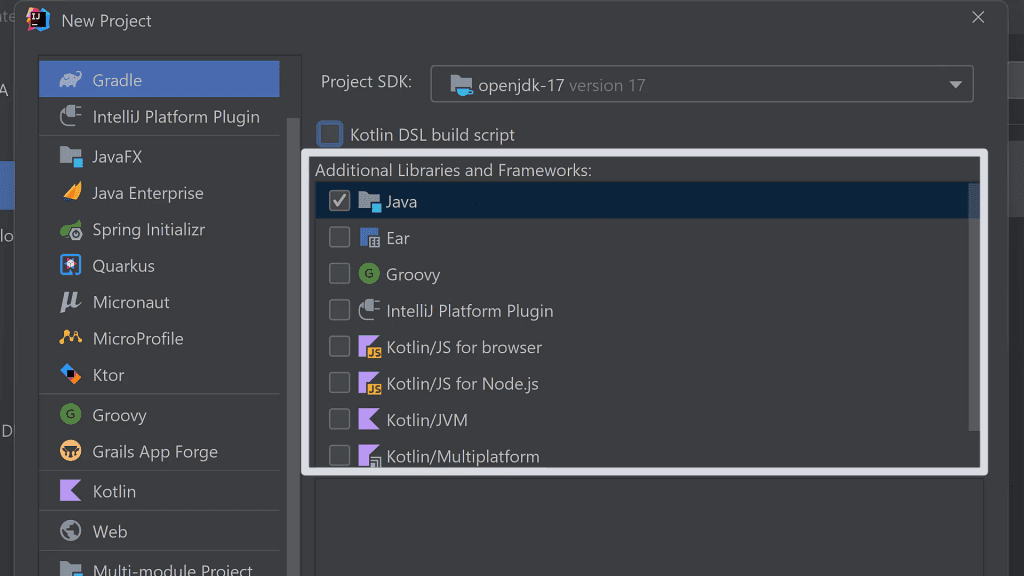
Select Next, enter a project name, and select Finish.
The generated project has all the expected Gradle files, including the build script, the wrapper scripts, and the settings file.
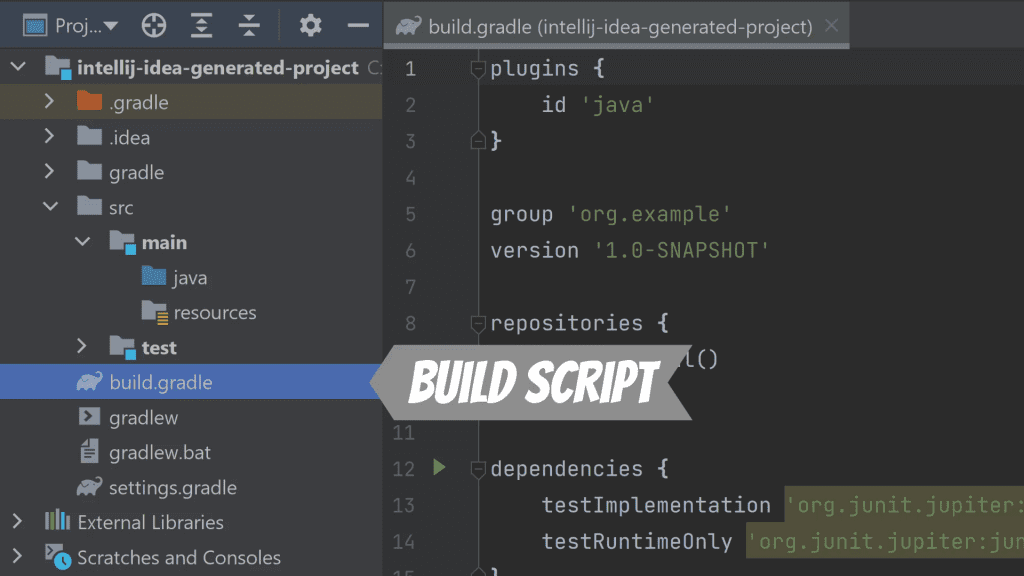
In the build script IntelliJ IDEA has applied the java plugin and added default configuration, based on our previous selection.
2) Run tasks from Gradle Tool Window
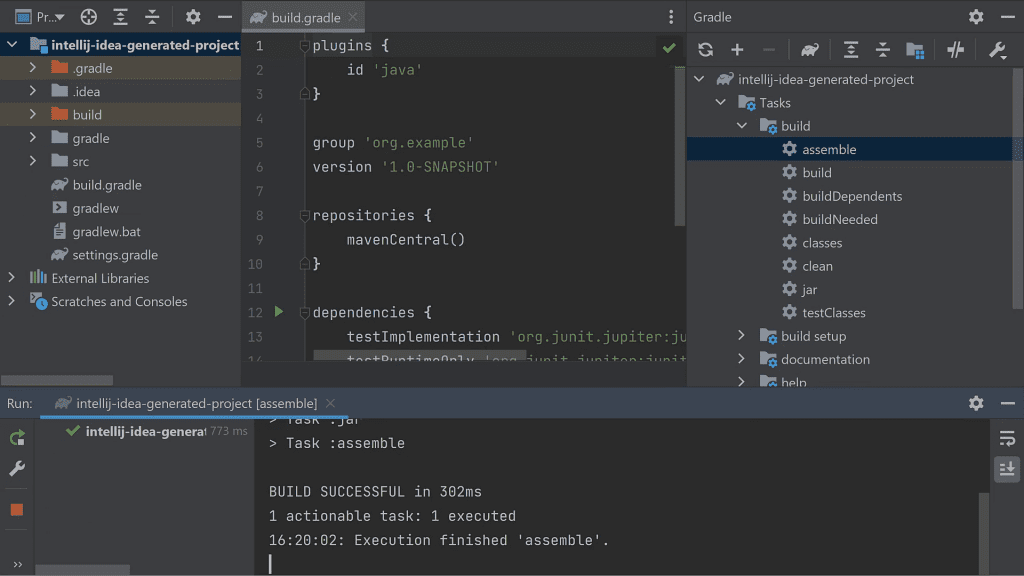
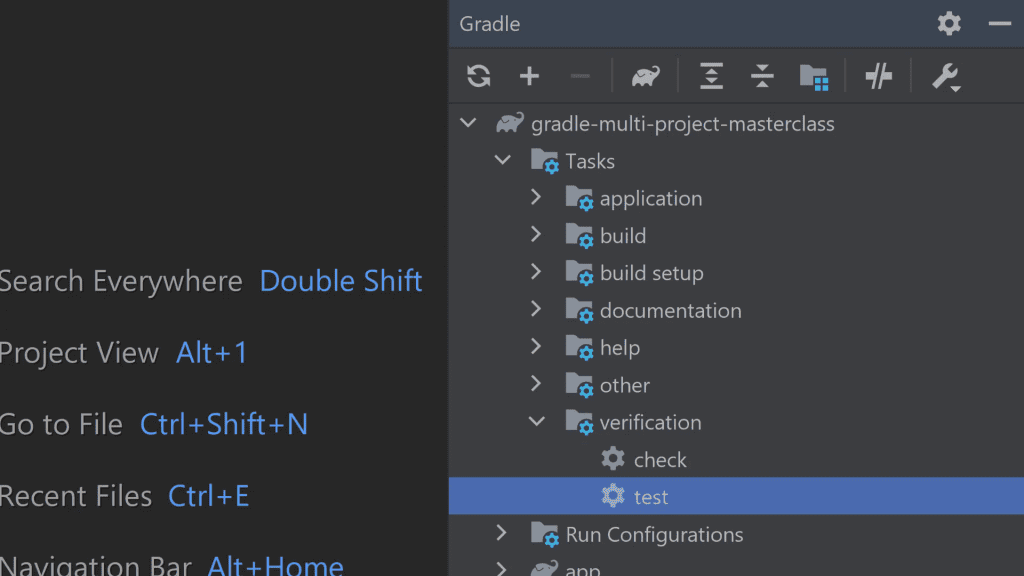
Running tasks is easy in IntelliJ IDEA using the Gradle Tool Window.
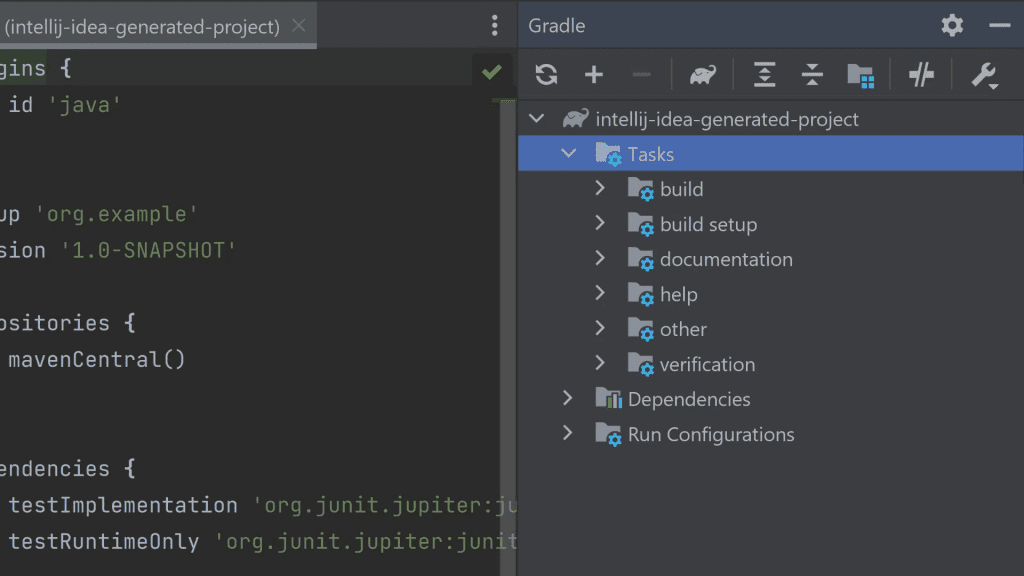
You access it using the shortcut Control+Tab, G (Windows) or ⌃ ⇥, G (Mac).
Alternatively select Gradle in the Tool Window Bar (on the right hand side of the screen), if you have it enabled.
Open Tasks to see tasks organised by group. Select your chosen task to execute.
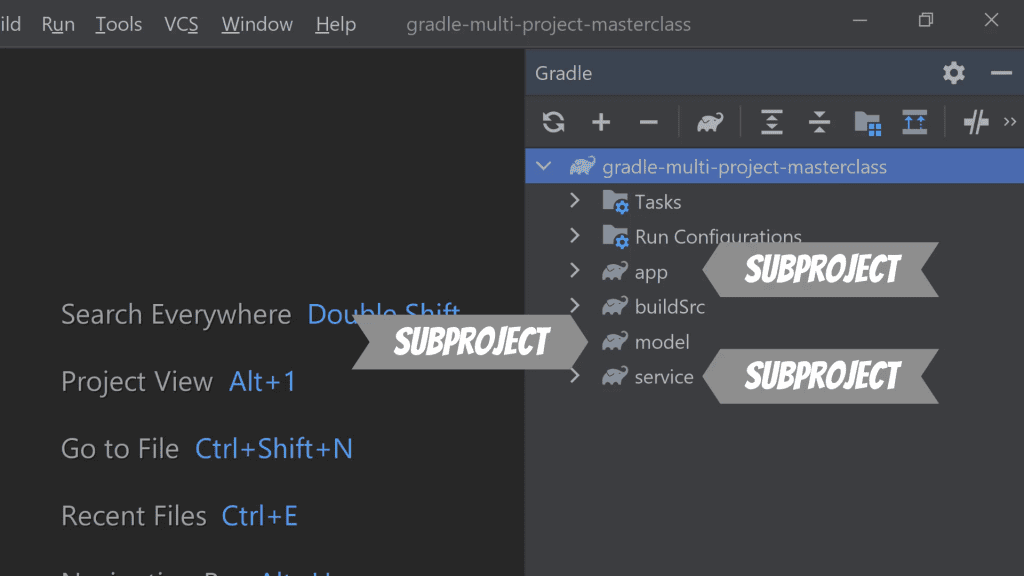
In multi-project builds tasks are organised into subprojects, so you can run a task against a specific subproject or against all projects by selecting the task at the root level.
3) Use Run Anything
Another way to run tasks is to double tap control to open the Run Anything dialog, which you access with Double Ctrl (Windows) or Double ^ (Mac).

Start typing gradle and it gives you a list of tasks you might want to execute. Keep typing to get more specific suggestions, then select the command to execute it.
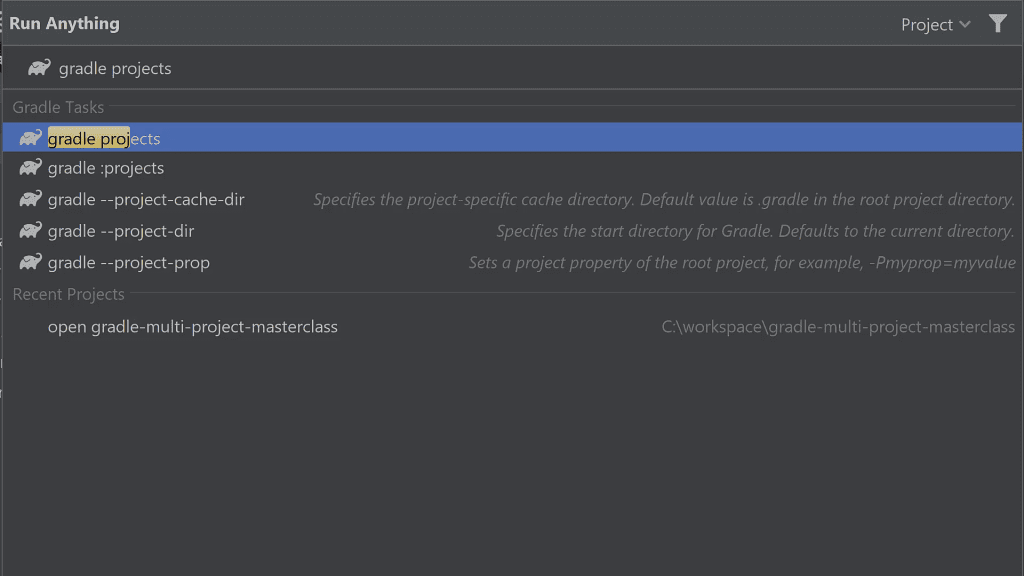
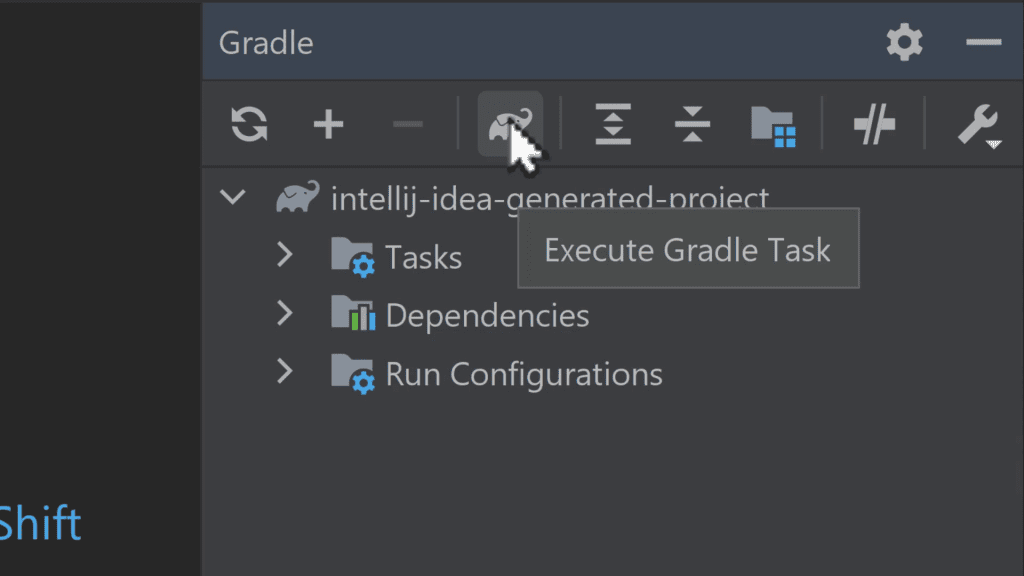
By the way, you can access the same dialog from the Gradle Tool Window via the elephant icon.
4) Load Gradle Changes after Gradle modifications
After making changes to a Gradle build script, they aren't automatically applied to IntelliJ IDEA.
For example, this new task doesn't appear in the Gradle Tool Window.
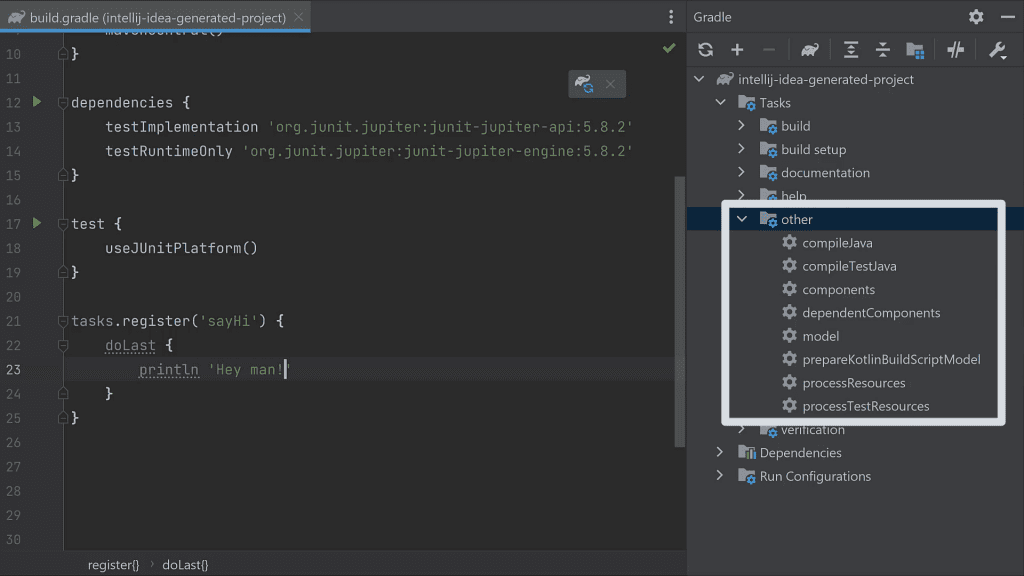
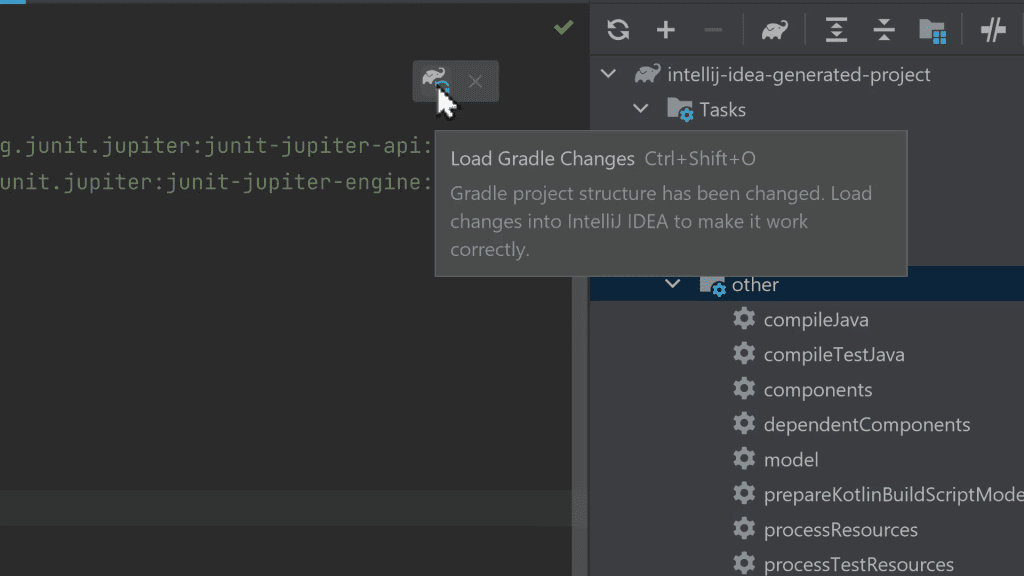
To fix that, click the Load Gradle Changes button that appears whenever you make a build script change. Alternatively press Ctrl+Shift+O (Windows) or ⌘⇧I (Mac).
If you prefer, you can setup IntelliJ IDEA to automatically load Gradle changes.
From the Gradle Tool Window go to Build Tool Settings > Auto-Reload Settings, choose Any changes and hit OK.
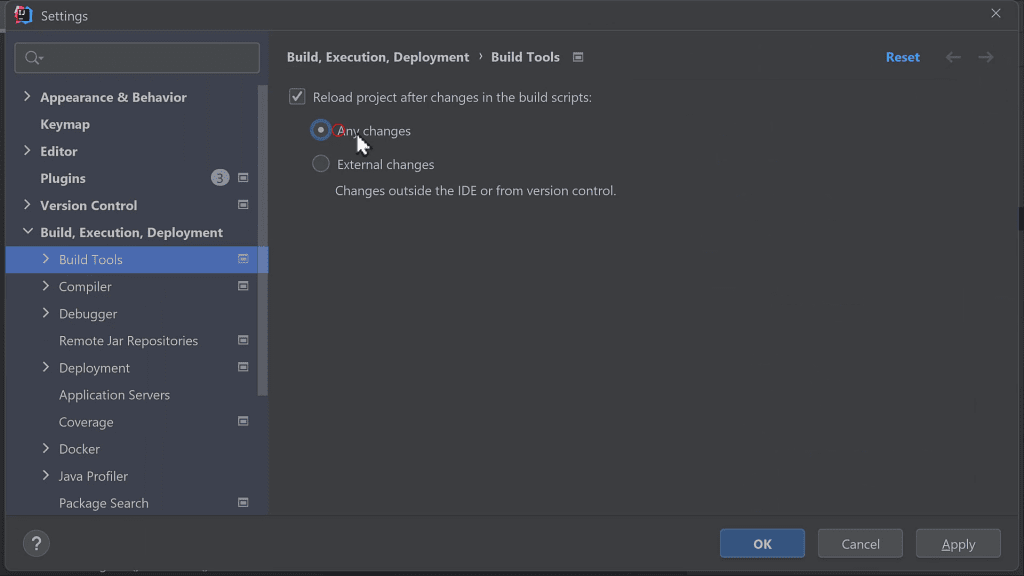
Now whatever you do in the build script is automatically applied.
5) Reload All Gradle Projects after changing buildSrc directory
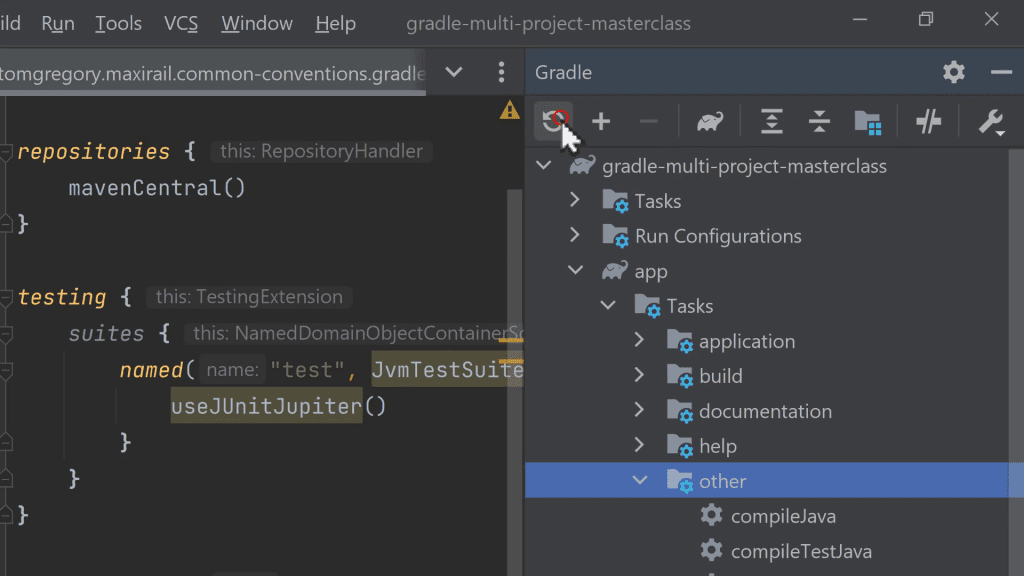
And now for a slightly more advanced tip. After making changes in the buildSrc directory (e.g. to a convention plugin), IntelliJ IDEA won't automatically apply the changes to your projects.
In the Gradle Tool Window select Reload All Gradle Projects for these changes to take effect.
6) Insert dependencies
When adding dependencies to a project, rather than looking up the group, name, and version externally (e.g. at mvnrepository.com), you can do all that from IntelliJ IDEA.
Navigate to the dependencies block of the build script, hit Alt+Insert (Windows) or ⌘ N (Mac), and select Add dependency.
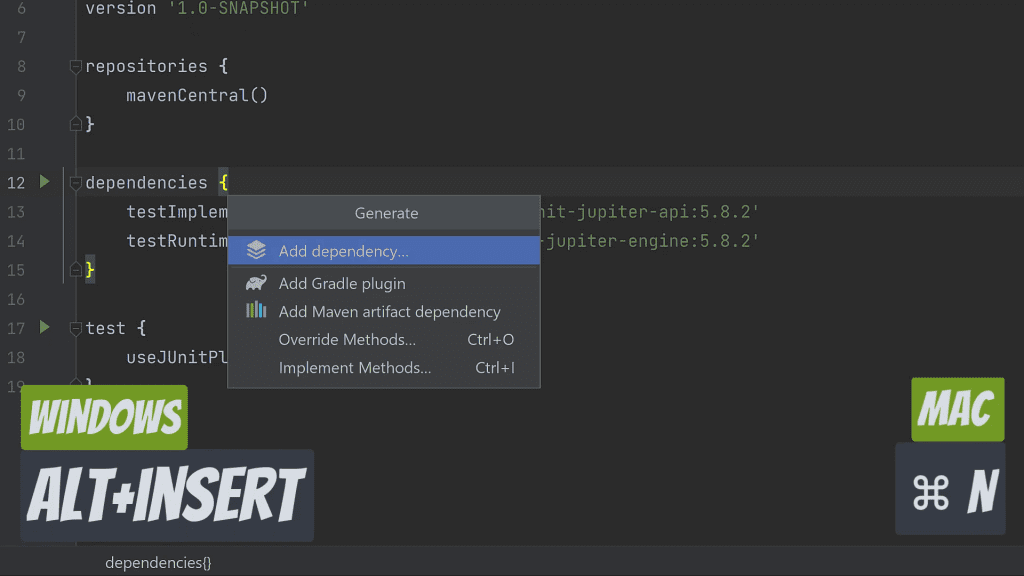
Search for a dependency by name, and in the results IntelliJ IDEA suggests a dependency configuration and the latest version, both of which you can modify.

Select Add to insert the dependency definition into the build script.
7) Use autocomplete in build scripts
When you start typing in a build script, IntelliJ IDEA gives you auto-complete suggestions.
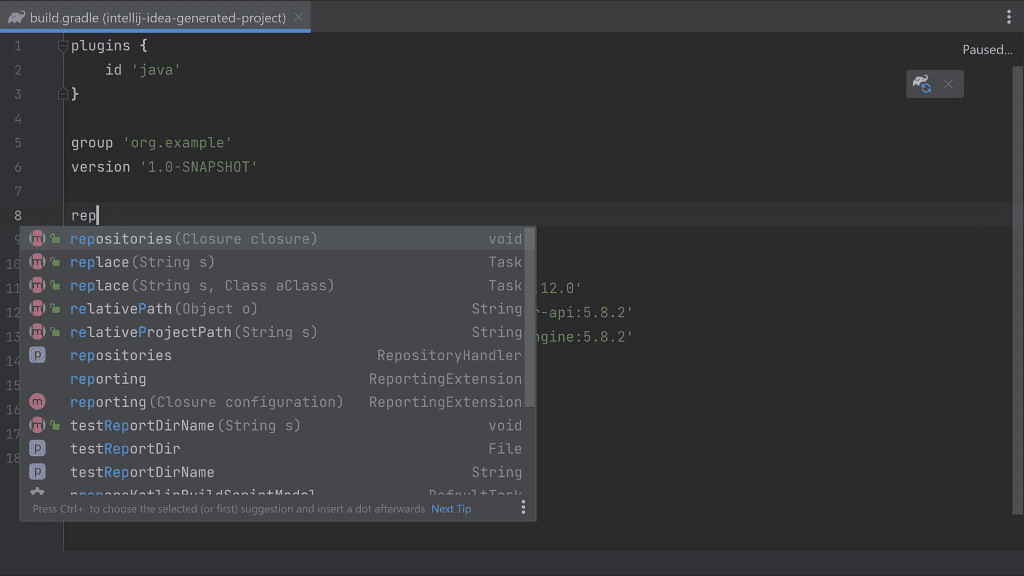
You can also press Ctrl+Space (Windows) or ⌃ Space (Mac) at any time to see the same list.
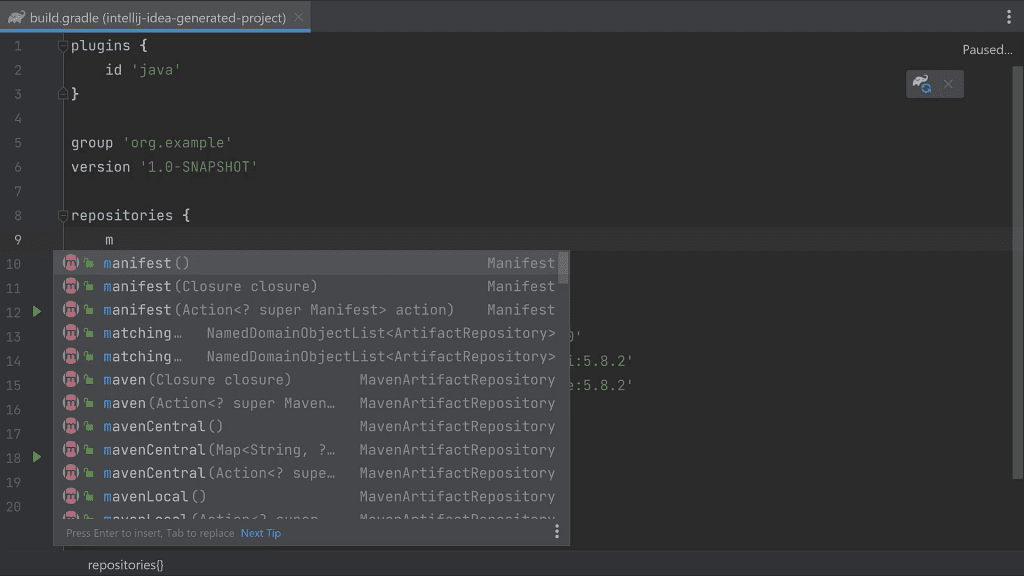
In Groovy build scripts, in some scenarios the suggestions aren't very helpful. For example, if I want to add the mavenCentral repository, I have many irrelevant suggestions.
In Kotlin build scripts this works a lot better.
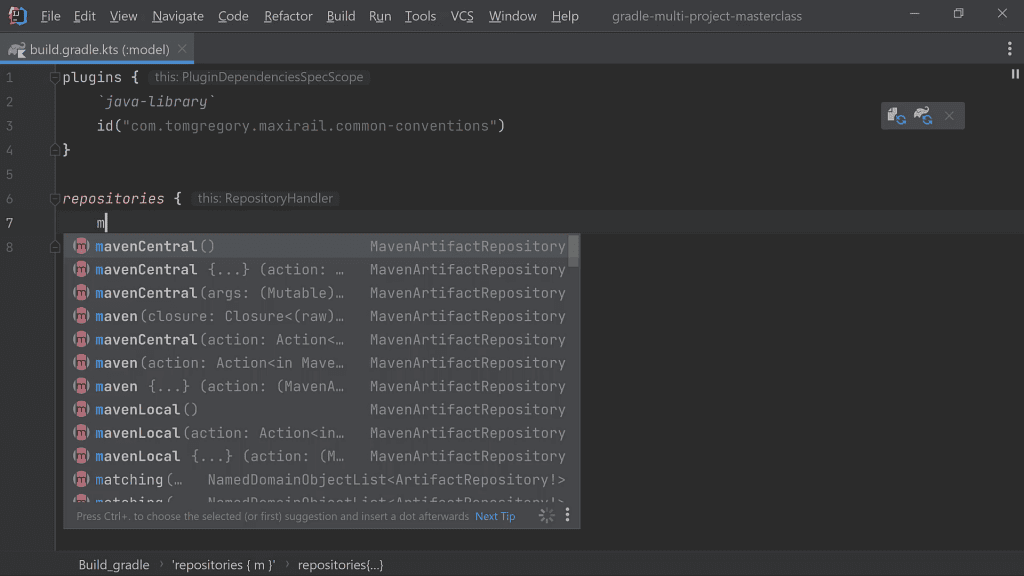
In any case, just hit Enter to accept the code suggestion.
8) View Gradle JavaDoc
To see what a particular build script method does, open the Documentation Tool Window with Ctrl+Q (Windows) or F1 (Mac). In theory this should show you the JavaDoc from the corresponding Gradle code.
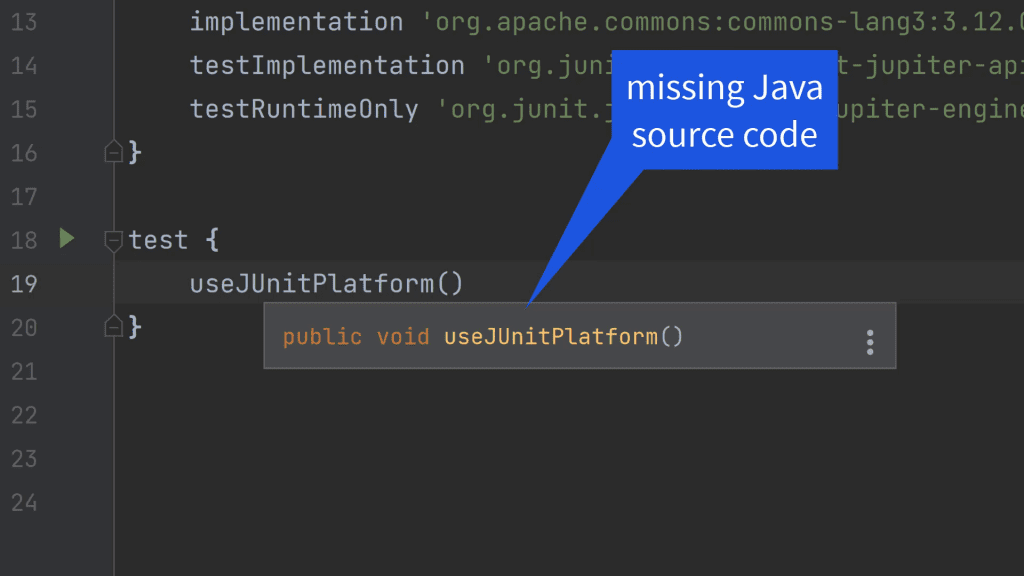
In this case the JavaDoc is missing since by default the Gradle wrapper doesn't include sources.
To fix that, run the Gradle wrapper task passing --distribution-type all.

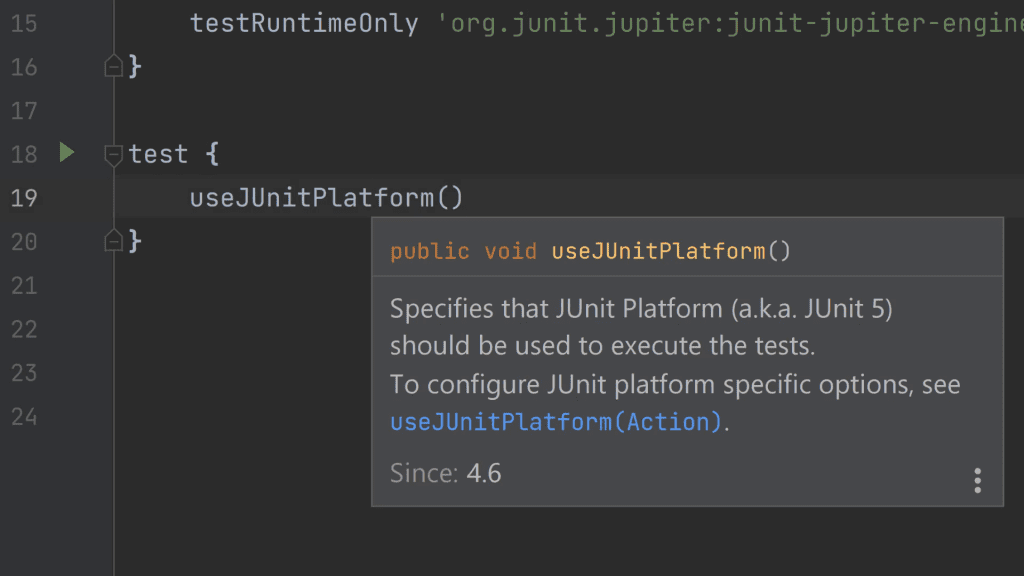
This updates the gradle-wrapper.properties file to reference the full Gradle distribution.
Now close and reopen your IntelliJ IDEA project, and the full JavaDoc is available to help you navigate around the build script more easily.
9) Run tests in IntelliJ IDEA
Run tests in IntelliJ IDEA to get the full benefit of IDE test integration.
Select the test task from the Gradle Tool Window, and consult the test results for any failures.
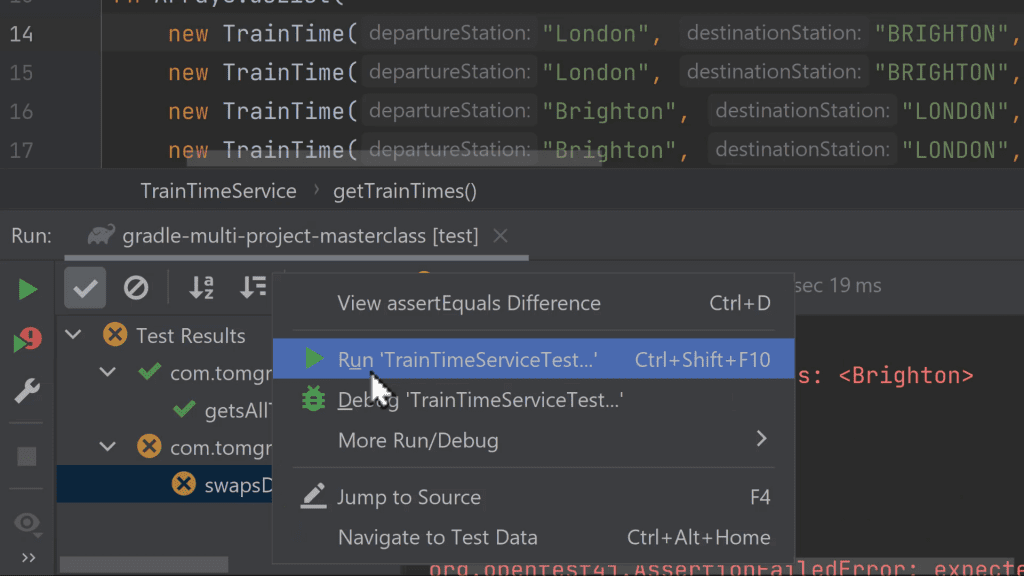
Once you've applied any fixes, you can run all the tests again with Shift+F10 (Windows) or ⌃ R (Mac). Or right click a failing test and select run to only run that specific test.
10) Browse dependencies in Gradle Tool Window
In the Gradle Tool Window you can see your project's dependencies, organised by dependency configuration.
For example, here are the compile classpath dependencies, including all transitive dependencies, shown in a tree structure.
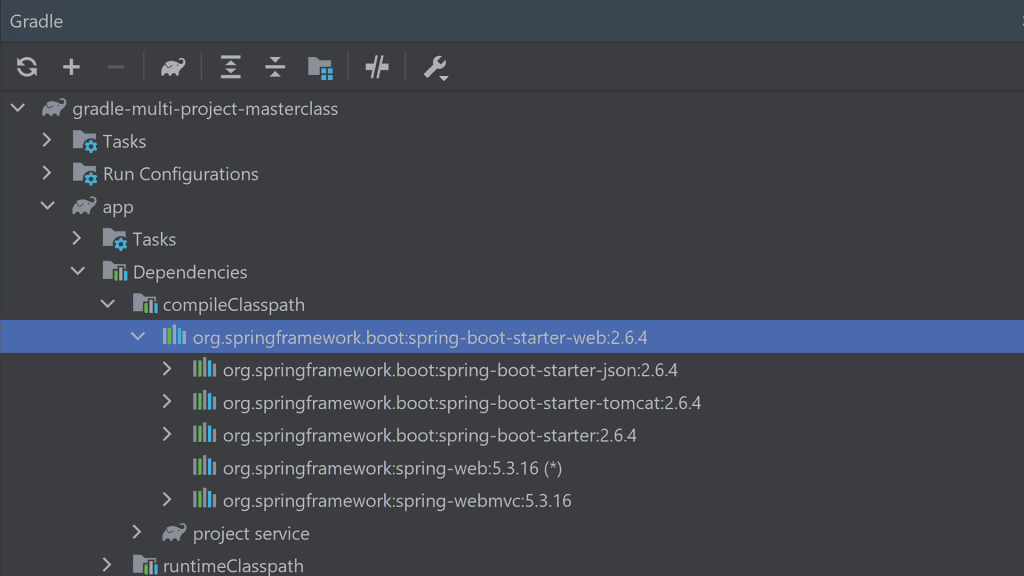
If you see an asterisk (*), that means this portion of the dependency tree was omitted since it was already shown elsewhere.
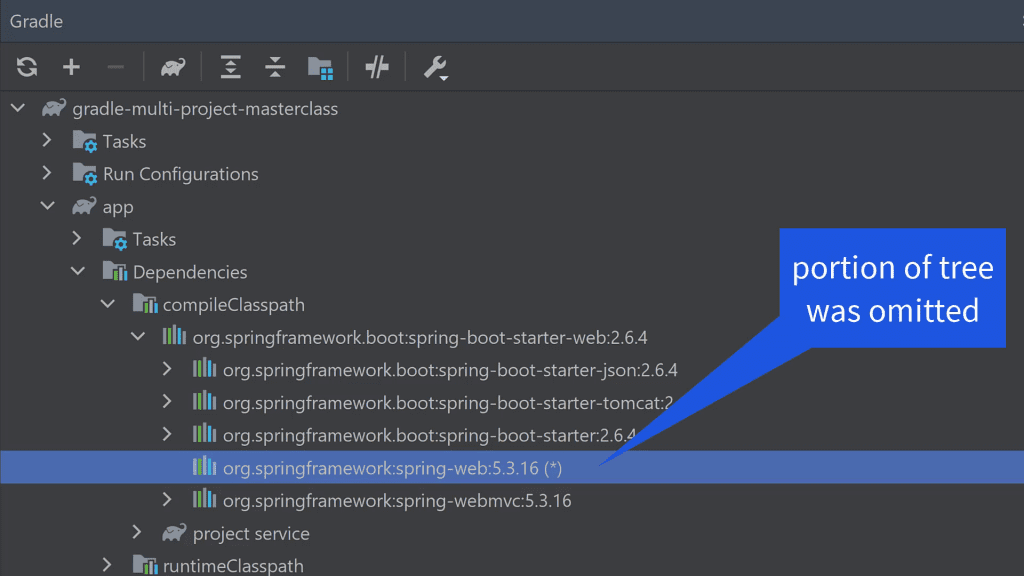
Select it to see that other location and continue working your way up the tree.
Want to learn more?
Understanding projects, build scripts, tasks, and plugins is essential to working effectively with Gradle. Discover all this and more in my super-helpful free Gradle Quick-Start Guide.
Watch this video demonstrating the ideas from this article.
Lack of Gradle knowledge slowing you down?
A broken build is easy enough to fix. But a misconfigured build is the silent time killer that costs hours every week.
Slow builds. Slow tests. Slow development.
But the official Gradle docs are confusing. Most developers never properly configure their projects—and as codebases grow, builds become bottlenecks.

This guide fixes that. It's a step-by-step walkthrough for Java developers who want to master Gradle fast.
- Unlock the mysteries of the build script.
- Speed up your workflow.
- Make development fun again.
If this is a problem you're dealing with in your own team, you can see how I approach software delivery in practice.