How to Measure Code Coverage Using SonarQube and Jacoco

Code coverage is a metric that teams use to measure the quality of their tests, and it represents the percentage of production code that has been tested. Discover how to apply the Gradle Jacoco plugin to your project and run a SonarQube scan to generate a code coverage report.
UPDATED in November 2021 to reflect SonarQube LTS version switching to 8.9.
1. Overview
SonarQube is a tool which aims to improve the quality of your code using static analysis techniques to report:
- code coverage
- bugs
- code smells
- security vulnerabilities
The SonarQube server is a standalone service which allows you to browse reports from all the different projects which have been scanned. To scan a specific codebase you run the SonarQube scanner. This is a local process that analyses your code then sends reports to the SonarQube server.

Code coverage
The code coverage metric has to be computed outside of SonarQube using a different tool. The result is then ingested into SonarQube and shown within its web interface.
The tool we'll look at today to calculate code coverage for a Java project is called Jacoco. Jacoco analyses the code and generates an XML report, which is later ingested by SonarQube.
2. A worked example
Let's run through an example of exactly how Jacoco and SonarQube work together to calculate code coverage. To do this we'll use the sonarqube-jacoco-code-coverage GitHub project, which you can clone to see it working with your own eyes.
We'll set up:
- an instance of SonarQube running in Docker
- a Java project with a class and some unit tests
- a Gradle build which generates a Jacoco code coverage report then runs the SonarQube scanner against the Java project

The project has 2 classes:
-
A
MathServiceclass which has 2 methods,multiplyandsubtract -
A
MathServiceTestclass which only tests 1 out of the 2 methods inMathService

So we're hoping that SonarQube will highlight the fact that we're missing a test here i.e. only one of the methods in MathService has been tested. Any guesses for what percentage code coverage SonarQube will report in this case? 🤔
3. Setting up a SonarQube instance
An official Docker image exists for SonarQube, making this really easy to get up and running using Docker Compose. Just add the following docker-compose.yml file to your project:
version: "3"
services:
  sonarqube:
    image: sonarqube:lts
    ports:
      - 9000:9000
    environment:
- SONAR\_FORCEAUTHENTICATION=false- uses the lts (long term support) version of the SonarQube Docker image, which is currently SonarQube version 8.9.
- SonarQube is configured to start on port 9000
- SonarQube authentication is disabled to simplify this demo. Always use authentication in a production environment.
To run Docker Compose from Gradle, just add this plugin to your build.gradle:
plugins {
    id 'com.avast.gradle.docker-compose' version '0.14.3'
    // any other plugins
}Now we can run ./gradlew composeUp to start the SonarQube Docker container through Gradle:
$ ./gradlew composeUp

> Task :composeUp
sonarqube uses an image, skipping
...
BUILD SUCCESSFUL in 19s
1 actionable task: 1 executed
That was successful, but we can double check everything is OK by seeing what Docker containers are running with docker ps:
$ docker ps
CONTAINER ID   IMAGE           COMMAND          CREATED              STATUS              PORTS                                       NAMES
35459fcff334   sonarqube:lts   "./bin/run.sh"   About a minute ago   Up About a minute   0.0.0.0:9000->9000/tcp, :::9000->9000/tcp   39b4a0caef82cbb00dd981c87ae00
c20\_sonarqube-jacoco-code-coverage\_\_sonarqube\_1
This shows that SonarQube is running on localhost:9000. It might take a minute for SonarQube to start up, but eventually within a browser you'll be able to reach the main SonarQube dashboard.
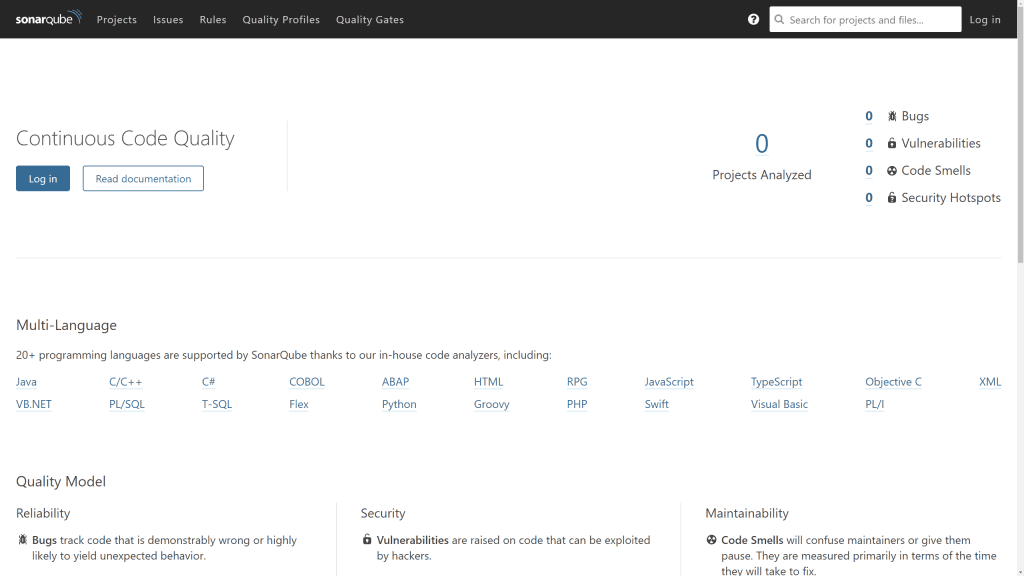
This is correctly reporting we currently have 0 projects analysed. Let's fix that! 👌
4. Using the Jacoco Gradle plugin
Before we get onto actually scanning our code with SonarQube, let's set up the Jacoco Gradle plugin. This will generate the test coverage statistics for our Java code. Just add the following plugin definition and configuration to build.gradle:
plugins {
    id 'jacoco'
    // any other plugins
}

jacocoTestReport {
    reports {
        xml.enabled true
    }
}
test.finalizedBy jacocoTestReport- we apply the jacoco plugin, a core Gradle plugin
- we configure the plugin to output test reports in the XML format required by SonarQube
- we use
finalizedByto ensure that the test report is always generated after tests are run
Now let's run ./gradlew test. Notice we have a new file reports/jacoco/test/jacocoTestReport.xml created in the build directory.
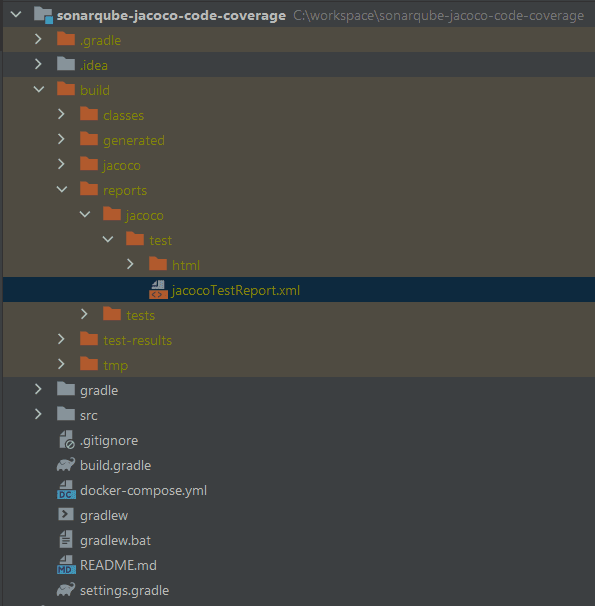
This contains the code coverage information that SonarQube will pick up during its scan.
5. Using the SonarQube Gradle plugin
Now that we've got our test code coverage data being generated by Jacoco, it's time to hook all this up by running a SonarQube scan. This will report on the code coverage as well as run a full scan of our code. To do this we'll use the SonarQube Gradle plugin which adds the sonarqube task to our build.
We can include it in our build.gradle like this:
plugins {
    id 'org.sonarqube' version '3.3'
    // any other plugins
}
We also need to include a configuration to tell the SonarQube scanner where to find the SonarQube server:
sonarqube {
    properties {
        property 'sonar.host.url', 'http://localhost:9000'
    }
}
Lastly, to ensure the Jacoco test report is always created when we run the sonarqube task let's setup the following dependsOn relationship:
tasks.named('sonarqube').configure {
    dependsOn test
}
Now we just need to run the sonarqube Gradle task to run a scan, with ./gradlew sonarqube.
$ ./gradlew sonarqube

Deprecated Gradle features were used in this build, making it incompatible with Gradle 8.0.

You can use '--warning-mode all' to show the individual deprecation warnings and determine if they come from your own scripts or plugins.

See https://docs.gradle.org/7.2/userguide/command\_line\_interface.html#sec:command\_line\_warnings

BUILD SUCCESSFUL in 10s
5 actionable tasks: 1 executed, 4 up-to-date
Success!
6. Viewing the SonarQube report details
We can head back to SonarQube at localhost:9000/projects to see the test code coverage report.
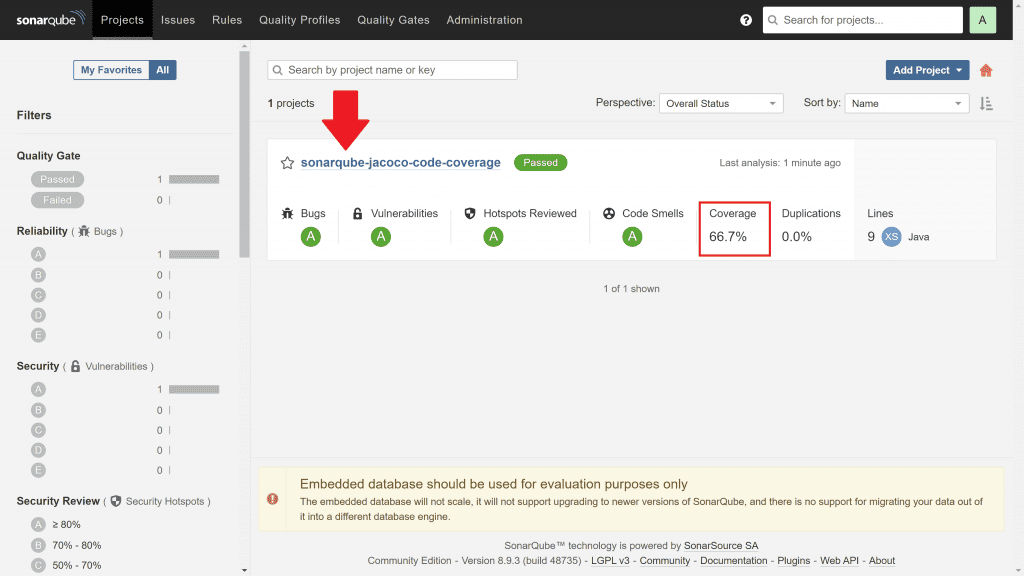
We can see a reported code coverage of 66.7%. Awesome! Click on the sonarqube-jacoco-code-coverage link and we'll try to drill into exactly how this was calculated.
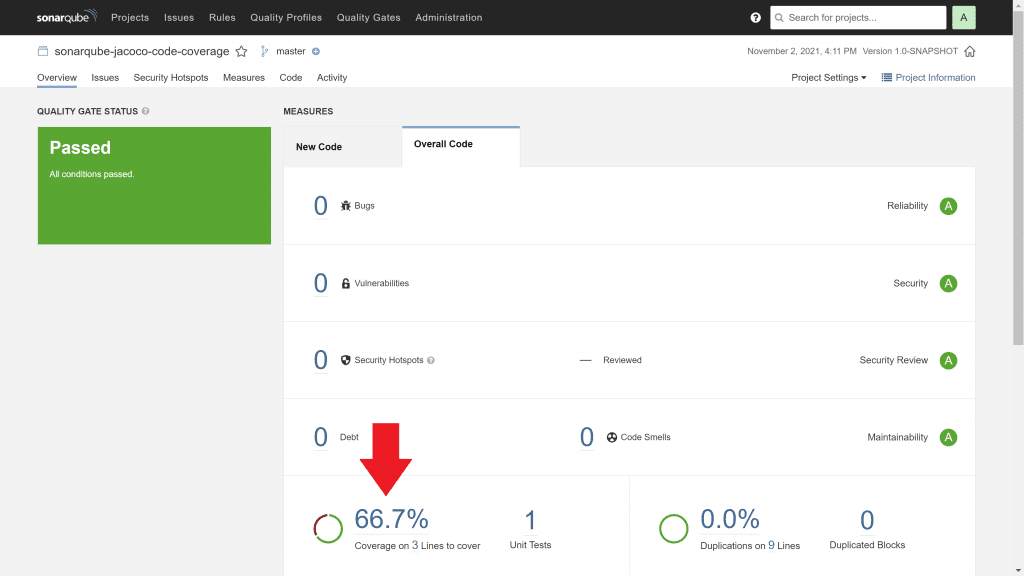
This is a more detailed view of the report. Click on the 66.7% link.
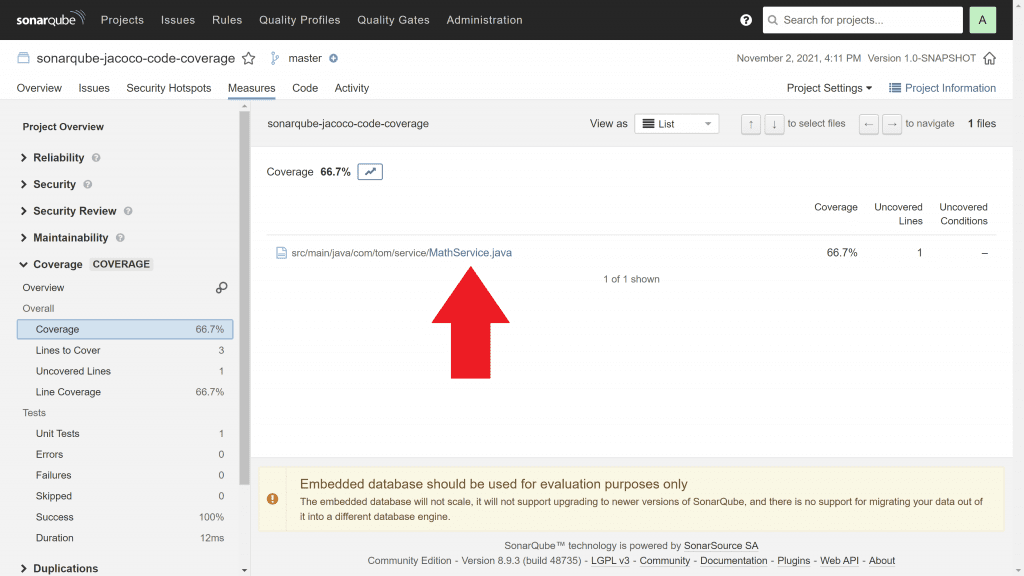
We now see information about what class has been analysed, in this case the MathService. Click on the link to see even more details:
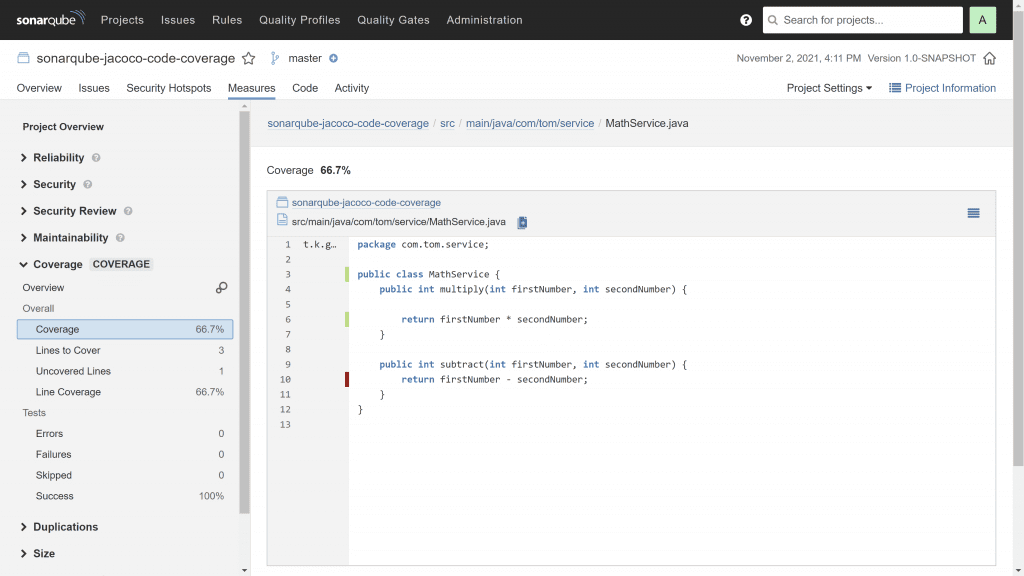
We can now see the class itself, where green highlights code that is properly tested and red code that isn't. Let's zoom in a bit:
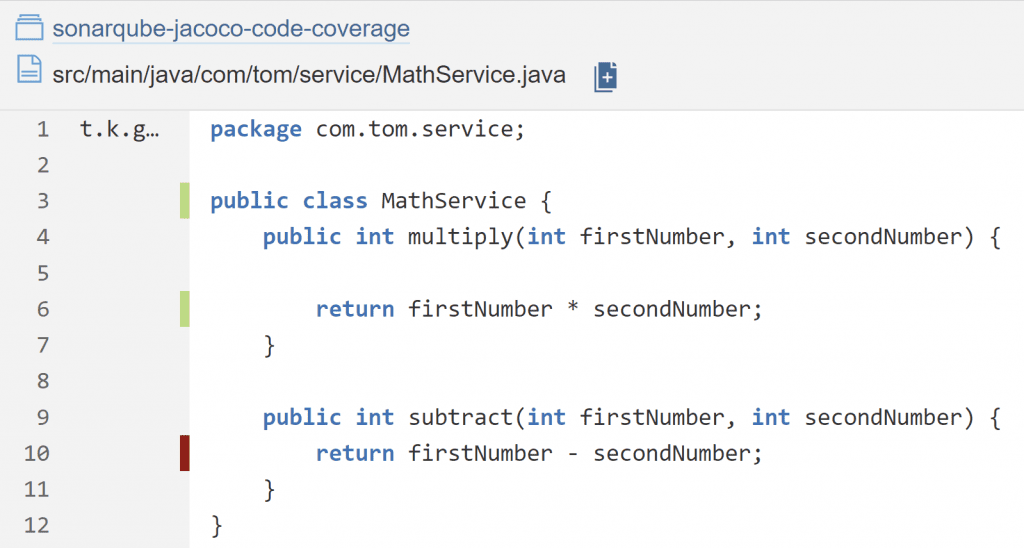
We can see that SonarQube is telling us that:
-
the class
MathServiceis covered by tests (green mark) -
the multiply method is covered by tests (green mark)
-
the subtract method is not covered by tests (red mark)
That makes 2 out of 3, hence the 66.7% being reported by SonarQube. So there's definitely room for improvement!
7. SonarQube 9
The above example uses the LTS version of SonarQube, currently 8.9. The same steps can be used to run against SonarQube 9.
You can view the SonarQube version at the bottom of any page on the web UI.

8. Conclusion
You've seen that it's really easy to setup code coverage reporting in a Gradle project using Jacoco and SonarQube. Try it out on your own project to see how you measure up.
Note that this isn't the only metric you should use to measure your test quality, but it can be a helpful indicator. Code may have a high code coverage percentage, but it might be brittle and difficult to maintain.
Do you want to include coverage data from integration tests? Find out how in Integration Test Code Coverage with SonarQube and Jacoco.
9. Resources
GITHUB REPOSITORY Follow along with this article by checking out the accompanying GitHub repository. This uses the LTS version of SonarQube (currently version 8.9).
SONARQUBE General documentation
GRADLE
- Jacoco Plugin docs
- SonarQube Plugin docs
- Gradle tutorial for complete beginners
Lack of Gradle knowledge slowing you down?
A broken build is easy enough to fix. But a misconfigured build is the silent time killer that costs hours every week.
Slow builds. Slow tests. Slow development.
But the official Gradle docs are confusing. Most developers never properly configure their projects—and as codebases grow, builds become bottlenecks.

This guide fixes that. It's a step-by-step walkthrough for Java developers who want to master Gradle fast.
- Unlock the mysteries of the build script.
- Speed up your workflow.
- Make development fun again.