If you ever worked on a project with even a single slow test, you know what a productivity-killer it is. Every time you want to push code or deploy a new version, that slow test puts the brakes on.
The problem is that slow tests have been written for a good reason. Whether they’re unit, integration, or end to end tests, they verify that critical functionality continues to work.
Resist the temptation to switch them off. There’s another way.
It’s a way to make better use of hardware you already have available—running tests in parallel. With quicker test execution, you’ll run tests more frequently for faster feedback and greater productivity.
Sequential test example
Let’s explore the slow test problem with an example project, which we’ll later configure to run in parallel.
Here’s a slow-old-java-project with 5 integration tests.
slow-old-java-project/src/integrationTest/java/com/gradlehero
|-- IntegrationTest1.java
|-- IntegrationTest2.java
|-- IntegrationTest3.java
|-- IntegrationTest4.java
`-- IntegrationTest5.java
And, you guessed it, they’re slow old integration tests. That’s because they depend on an external integration point with a 10 second delay.
For 5 tests, that’s 5 x 10 seconds plus a bit extra for good measure.
Let’s try it out by running the integrationTest Gradle task.
$ ./gradlew integrationTest

BUILD SUCCESSFUL in 52s
4 actionable tasks: 3 executed, 1 up-to-date
52 seconds is too long for developers keen to continue working.
So what to do?
Take a closer look at the tests while they run. They run one after the other, or in other words sequentially.

But what if we could run all these tests at the same time? Offload each one to a little Gradle worker that gives it the attention it deserves.
Moving to parallel execution
To set up parallel tests is easy peasy in the Gradle build script.
Locate the task you want to configure by name, and set a special maxParallelForks property.
Here’s how that looks in the Kotlin build.gradle.kts.
tasks.named<Test>("integrationTest") {
    maxParallelForks = (Runtime.getRuntime().availableProcessors() / 2).coerceAtLeast(1)
}
The default value for maxParallelForks is 1, which is why Gradle normally runs tests sequentially.
But increase its value and Gradle splits your tests between that number of runners.
Gradle recommend using half your CPU cores, which the above code snippet calculates for you. I’ve got a badass machine, so Gradle should spin up 6 test forks.
Let’s run the integrationTest task again and see what happens.
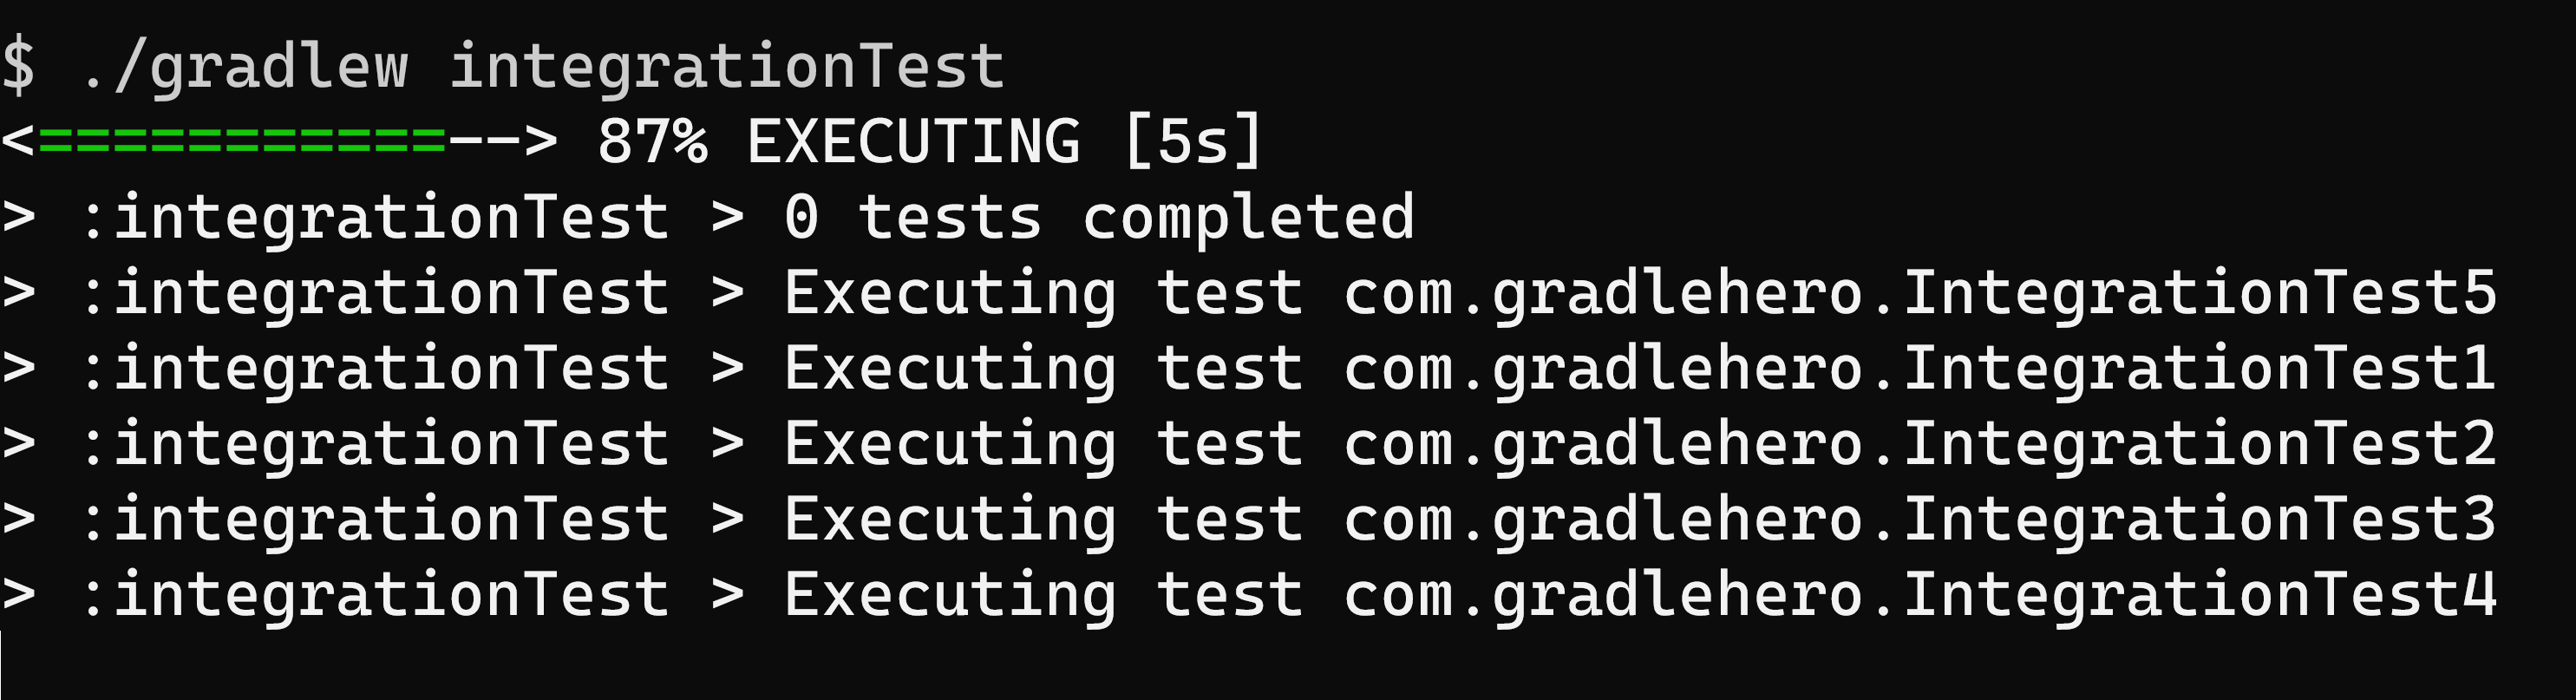
The console shows Gradle now runs tests in parallel. That’s forking amazing!
Even better, our integration test time went from 52s to 12s. Over 4 times faster!
Parallel test caveats
Before you go try this on your own project, there are 2 teeny caveats you need to know about.
- Forking multiple test processes itself has an overhead.
That means setting
maxParallelForksgreater than one can slow down tests in some situations, like running unit tests that are already fast. Experiment withmaxParallelForksfor each test task in your Gradle build, measuring the task duration using build scan. - Running tests in parallel is a good idea only if they’re independent. That means you can run them in any order and they still pass. If not, you might replace slow tests with flaky tests, which is even worse.
Don’t miss the chance to impress your team by running your build even a little faster. Try out parallel tests in your own project and let me know if it makes a difference by leaving a comment below.
Stop reading Gradle articles like these
This article helps you fix a specific problem, but it doesn't teach you the Gradle fundamentals you need to actually help your team succeed.
Instead, follow a step-by-step process that makes getting started with Gradle easy.
