Top 5 Gradle benefits over Maven

You might be surprised how much difference Gradle can make compared to Maven in terms of developer productivity. To show you how, here are the top 5 benefits of using Gradle, each with a full comparison with Maven.
1. Much faster
Gradle is faster. A lot faster.
This is a massive productivity boost to developers building projects many times each day.
Let's be specific about what faster means, by comparing Maven and Gradle's performance in a real project. This small Java project has 10 sub-modules, each with 50 main classes and 50 test classes. 1,000 classes in total.
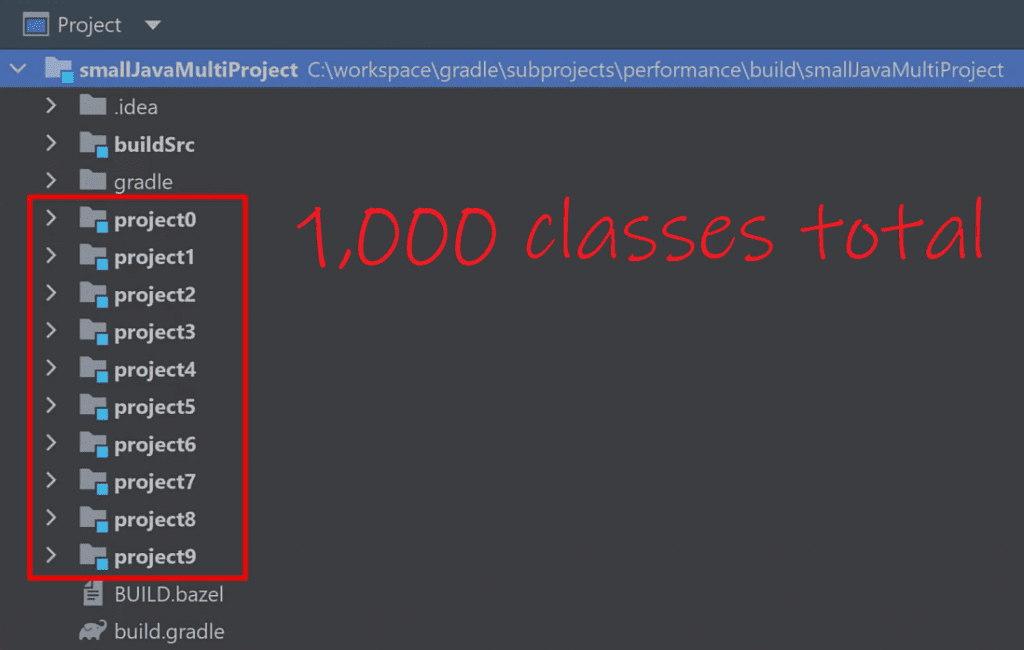
The build process required for this project is simple: compile the code & run the tests.
It's already setup with both Maven's pom.xml build files and Gradle's build.gradle build scripts.
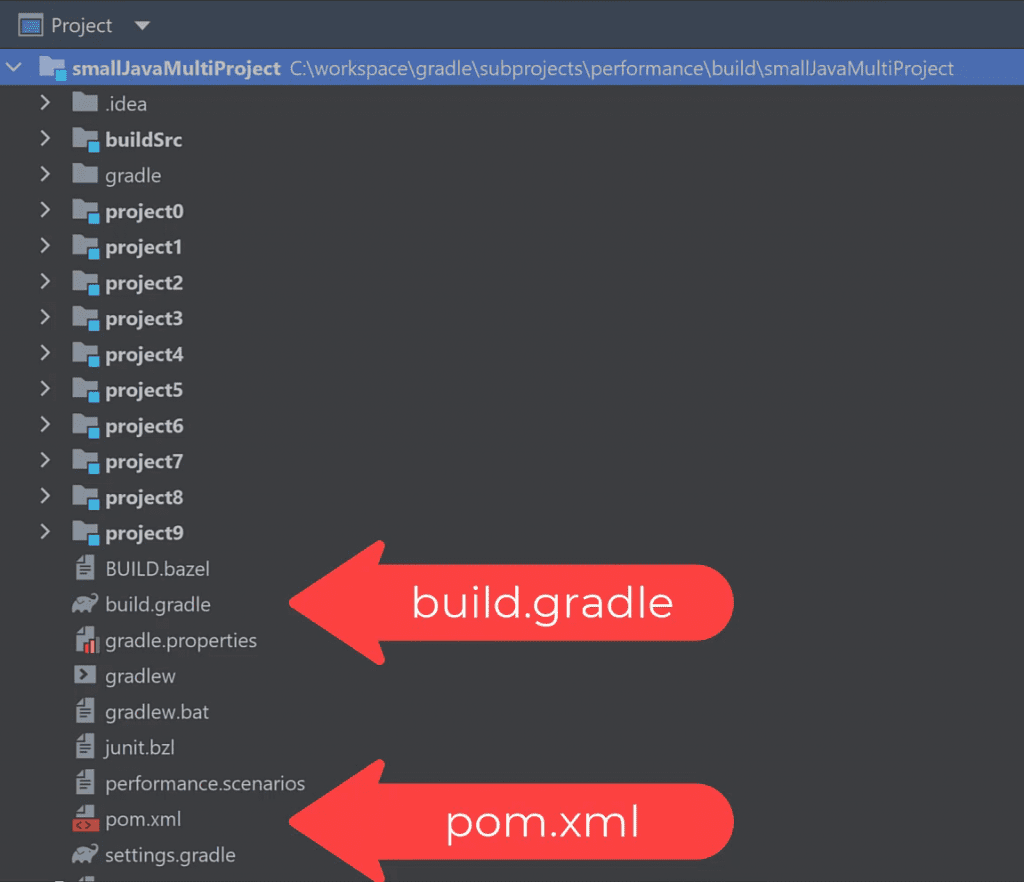
Let's run the Maven build with mvn package. It compiles the code and runs the tests.
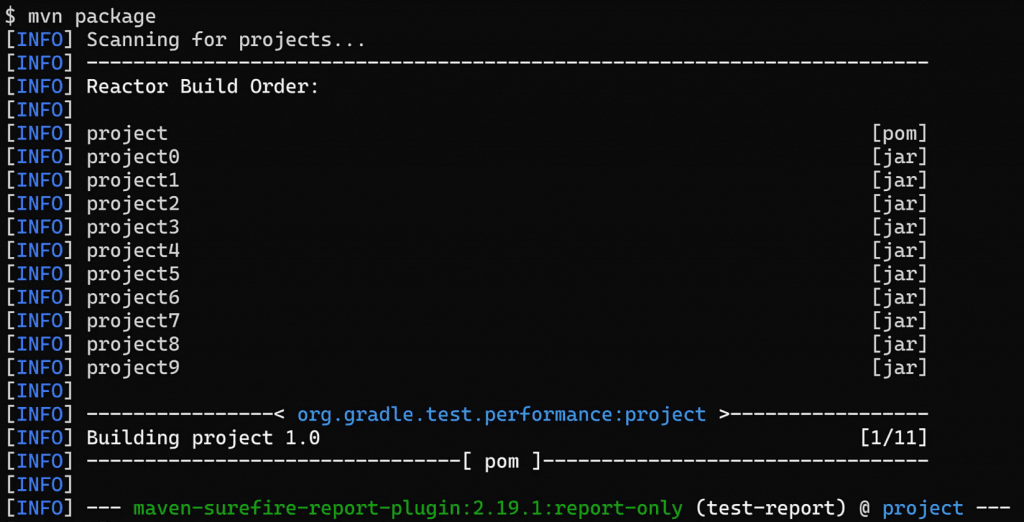
I'll run it 3 more times, which are faster since Maven can reuse some of the previously generated outputs. I'll take the average of these 3 builds, which gives 17 seconds.
Note that I'm not cleaning the project or making any changes between builds.
Moving onto Gradle, we'll run ./gradlew build. It compiles the code and runs the tests. I'll run it 3 more times, which gives an average of 1 second.
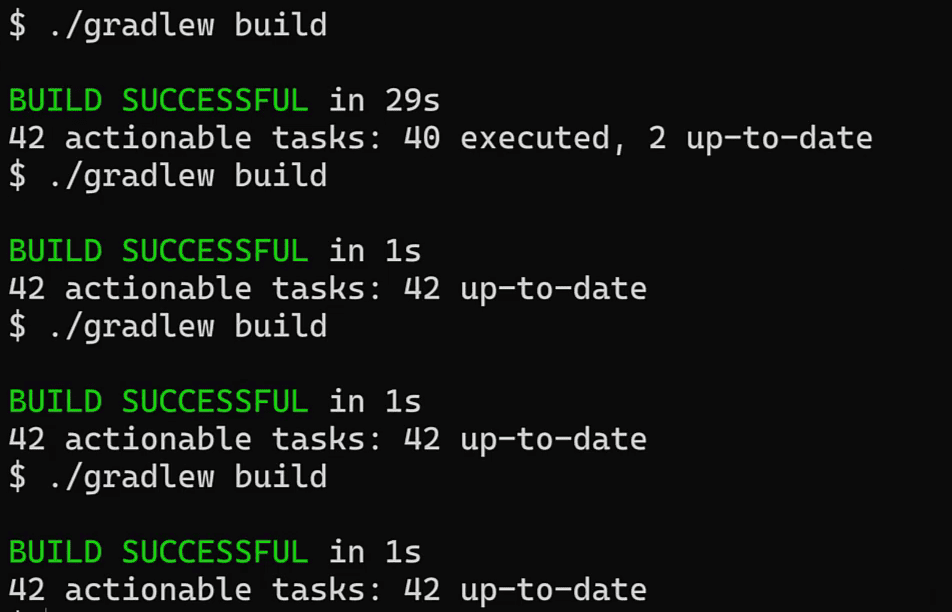
That's quite a difference! So what's happening here to make Gradle faster?
Gradle's performance advantages
Well, Gradle took a lot of inspiration from Maven, but along the way made some important optimisations.
The biggest is incremental build, which in a nutshell means Gradle doesn't do the same task again if nothing has changed. Incremental build works for compilation, test execution, or any other task that happens in your build.
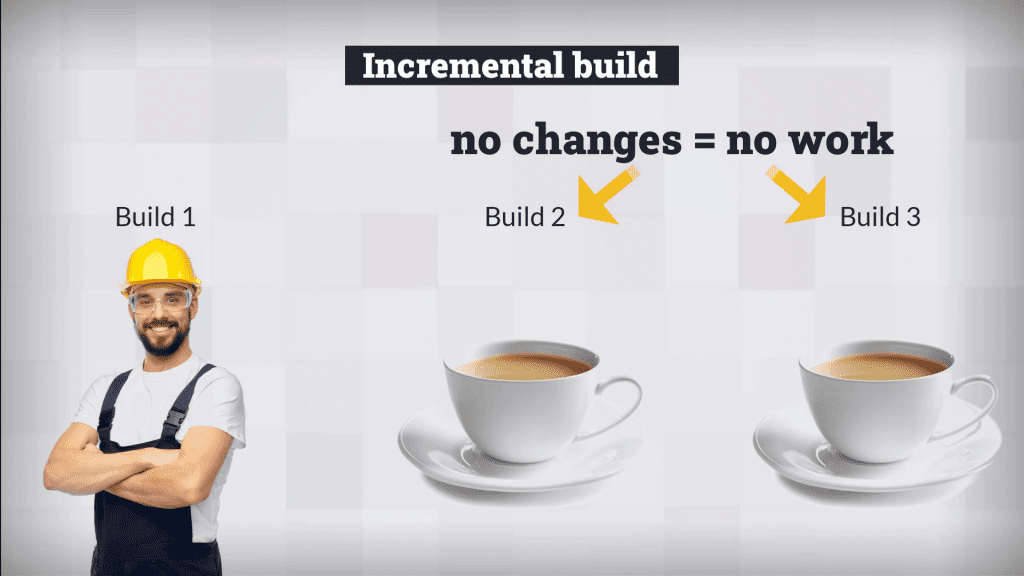
Gradle keeps track of each task's inputs and outputs. Only when these change does the task get rerun.
Maven doesn't have anything so advanced. It attempts not to recompile unchanged code, but it still runs all tests again on every build, even when nothing's changed.
There's also the Gradle daemon, which constantly runs Gradle in the background, ready execute a build.
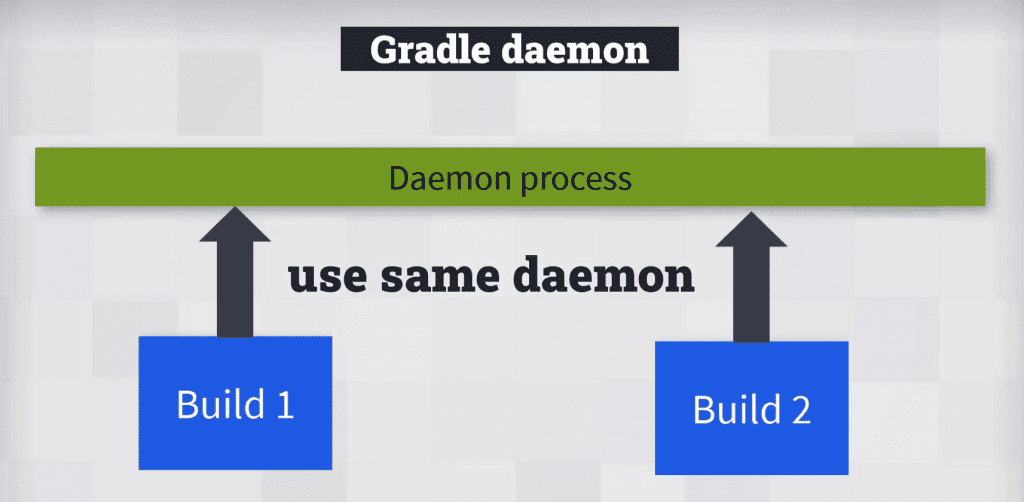
This improves the build time by over 5 seconds. Maven doesn't have such a feature.
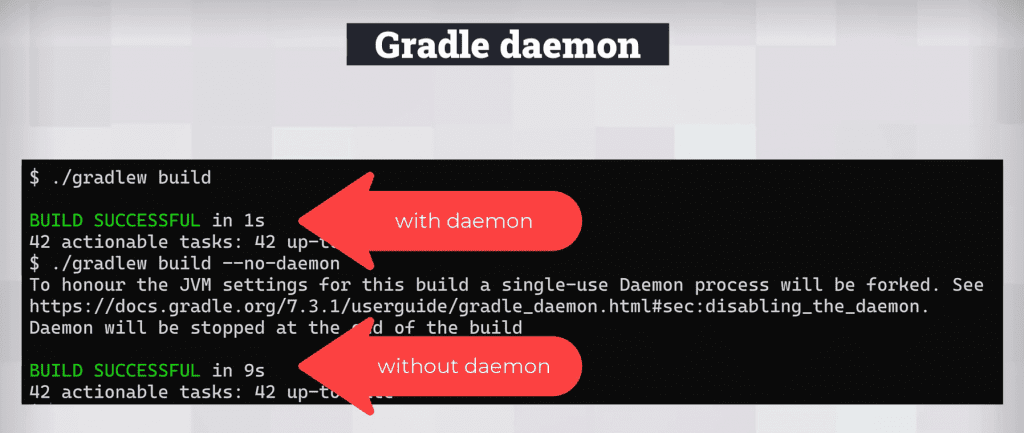
To compare Maven and Gradle's performance fully you'll want to consider other scenarios:
-
what happens when you make a minor code change then rebuild?
-
what happens when building a large single project monolith?
Gradle have published this article with performance results for all these scenarios. It says Gradle is at least twice as fast in every scenario, and sometimes up to 85 times faster.
Gradle's performance advantages over Maven mean less time waiting for your build, more time doing important work.
2. Concise build script (no XML)
Defining how to build your project in Gradle is much more concise than Maven.
To show you how, I created a simple single module Java project based on this repository. I added Maven pom.xml and Gradle build.gradle files. They both do the same thing of compiling and testing the project.
Maven's XML build file comes in at 66 lines whereas Gradle's Groovy build script is only 37 lines, so about half the size. Maven is just a lot more wordy than Gradle.
There's no other reason for this other than, well, XML.
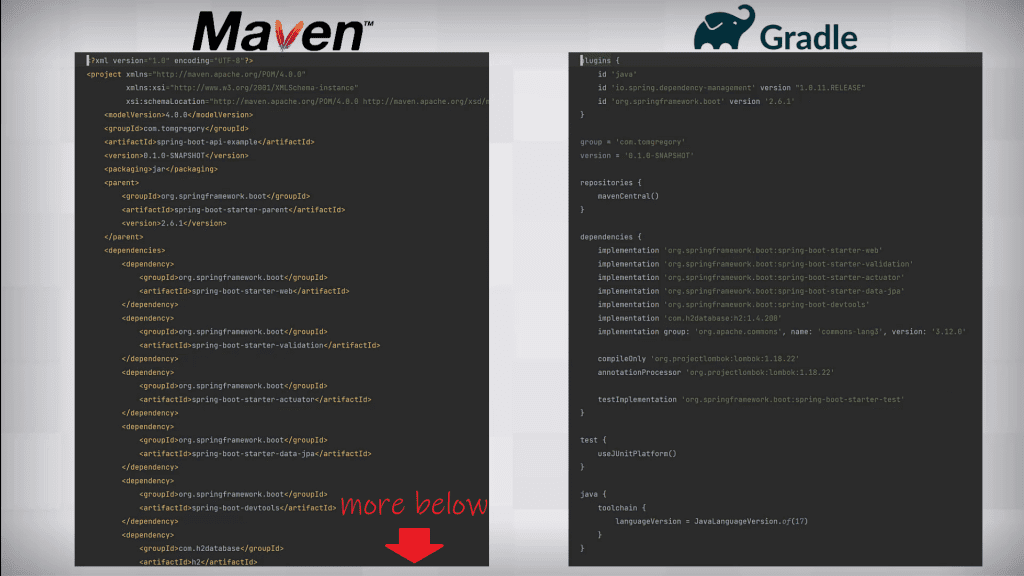
To do the same work, the Maven build file has almost twice the lines
Gradle chose a code based build script. This means you configure a build by calling methods using the Groovy language, rather than using XML tags.
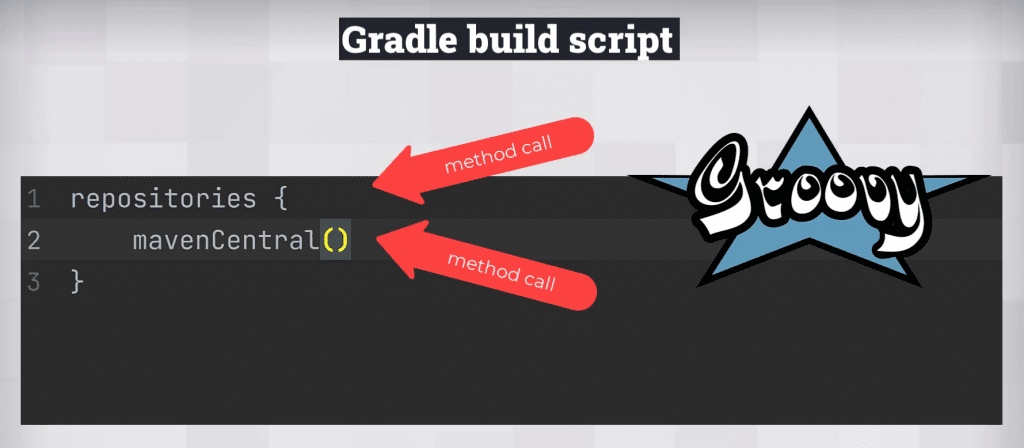
But the Groovy language has been used in a way that makes the build script look more like a definition than a script.
While different people find different file formats easier to read, such a dramatic size difference has some clear benefits.
Advantages of concise build scripts
It helps readability, so you can scan through a build file and get to the point faster.
In Gradle I can see all the dependencies at once, without scrolling through pages of XML.
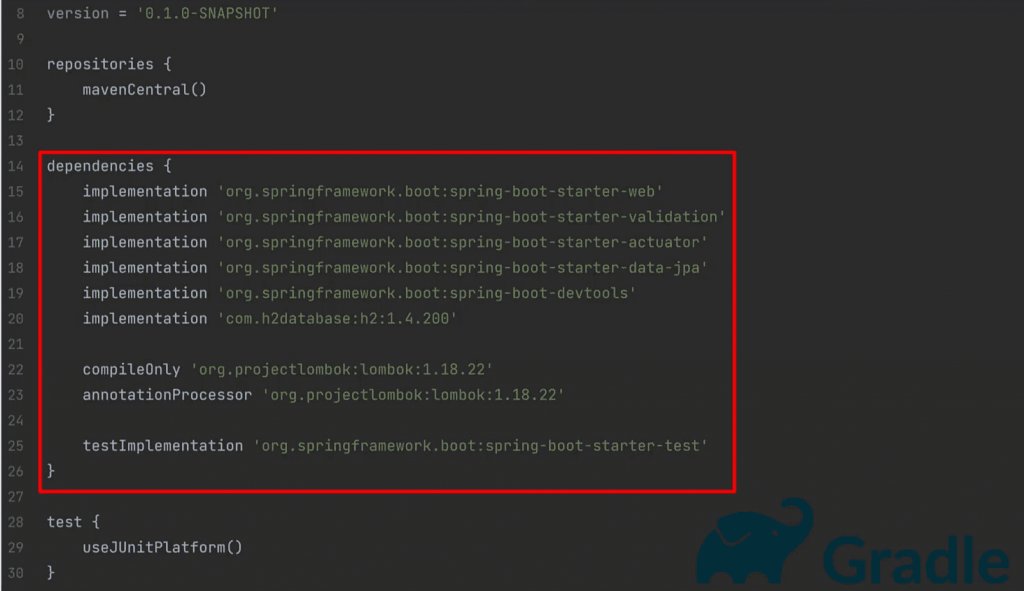
It helps maintainability, since to make changes you need to modify less code.
To add a new dependency in Gradle is a 1, rather than 4 line pull request.
implementation group: 'org.apache.commons', name: 'commons-lang3', version: '3.12.0'I don't mean to come across as unnecessarily bashing XML. Actually...yes I do!
Because more concise build scripts means less time trying to understand your build, more time doing important work.
And as you'll see soon, using code to define your build has some other fairly significant advantages.
3. Easy customisation
Gradle is easier to customise than Maven.
The only way to add custom build logic in Maven is to use an existing plugin or create your own.
Recently I wanted to print out the dependency count in a Maven project and I had to.
-
create a new Maven plugin project
-
write the code to calculate and print out the dependency count
-
run
mvn installagainst the new plugin project -
add the plugin to the pom.xml of the project I wanted to use it in
In Gradle I just add a single task to the build script.
tasks.register('countDependencies') {
    def configuration = findProperty('configuration') ?: 'compileClasspath'
    doLast {
        println "Number of dependencies: ${configurations.getByName(configuration).getAllDependencies().size()}"
    }
}
The code based nature of build.gradle lets us add functionality more dynamically than Maven.
And yes, I know. With great power comes great responsibility. You could easily overuse this privilege and end up with custom build logic all over the place. But we're conscientious developers right?
Well I try to be. 😁 But as you'll see later, Gradle has many options to move build logic out of the build script for maintainability and reuse.
Dynamic build model
One important difference with Gradle is it has a more dynamic model to represent your build. You can change this model on the fly using the Gradle APIs directly in your build script.
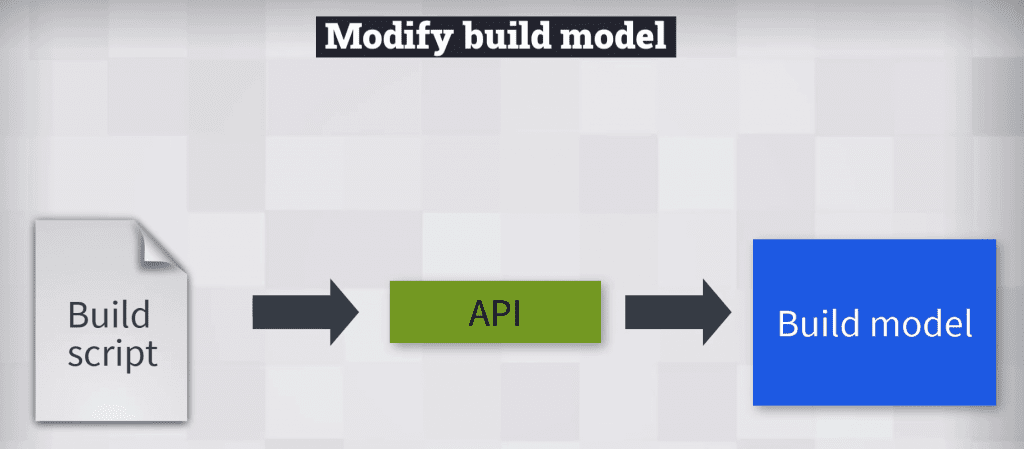
For example, part of the model is called the task graph, representing all the tasks to be executed and their relationship to each other.
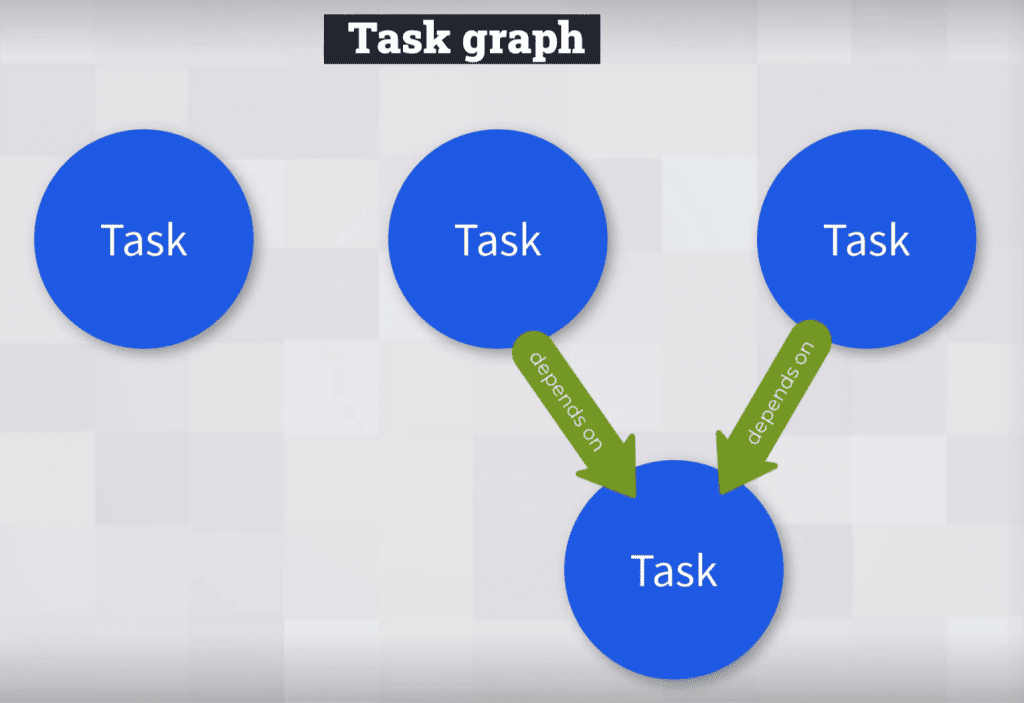
The countDependencies task we defined earlier can be hooked into whatever point we need it to run in the build, like when the main code is compiled.
compileJava.dependsOn countDependenciesYou can even configure the task to only execute under certain conditions. For example, only if building in a CI environment.
def isCIEnvironment() {
   return false
}

myTask.onlyIf { isCIEnvironment() }
The final point, which you probably already realised, is that anything you can do in the Groovy language you can also do in your build script.
While you or your team might want to place limits on that, it can be immensely useful for transforming strings or even adding log statements to help debug issues.
configurations.all { println it.name }Since Gradle is more easily customisable than Maven, that means less time working on your build, more time doing important work.
4. Promotes build code reuse
Gradle encourages you to treat your build code like you would production code. Or in other words keeps it D-R-Y (Don't Repeat Yourself).
Code reuse in Gradle happens on 3 different levels.
-
build script
-
project
-
cross-project
Which level you choose depends on the amount of reuse you require.
In Maven there's one level of reuse, cross-project, which is when you create a Maven plugin. While this is sometimes helpful, we don't always want the overhead of maintaining a separate project, especially when the build logic applies to one project only.
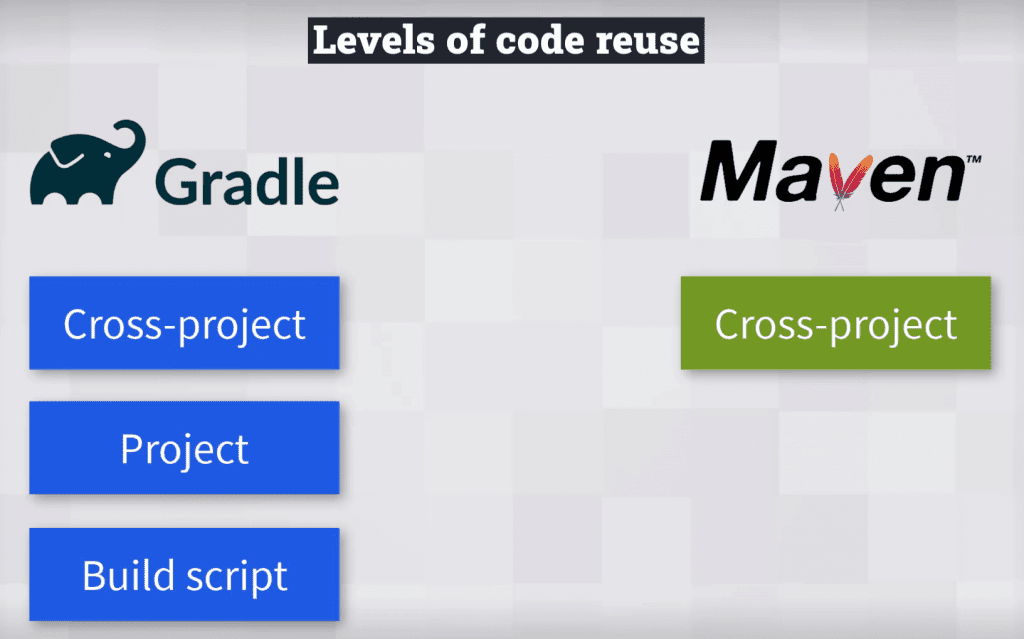
Build script level code reuse
In the build script we can define custom methods and classes.
For example, we can create a class for a task which prints out a greeting for a specific person. Then define multiple tasks, referencing this class.
abstract class SayHello extends DefaultTask {
   @Input
   abstract Property<String> getPersonName()

   @TaskAction
   def sayHello() {
       println "Hello ${personName.get()}!"
   }
}

tasks.register('hiJohn', SayHello) {
   personName = 'John'
}

tasks.register('hiSuzie', SayHello) {
   personName = 'Suzie'
}
But what if we wanted to use this task in multiple subprojects?
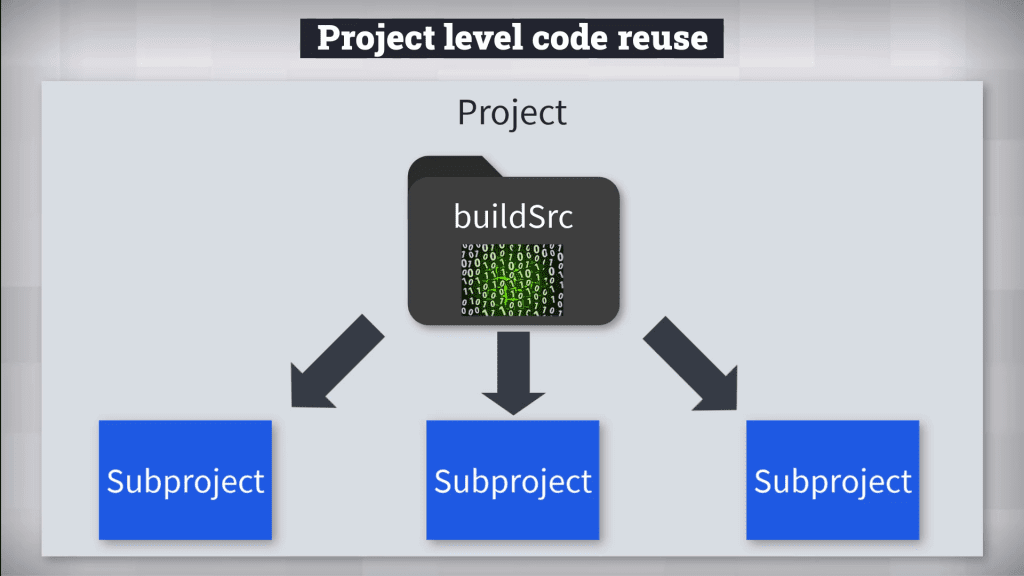
Project level code reuse
In Gradle we can extract the class into a special project directory called buildSrc. This is the 2nd level of reuse. Any code you put in buildSrc is available to the build.gradle file of other subprojects.
Cross-project level code reuse
The third level of reuse is extracting our task into its own project to be published and reused by multiple separate projects.
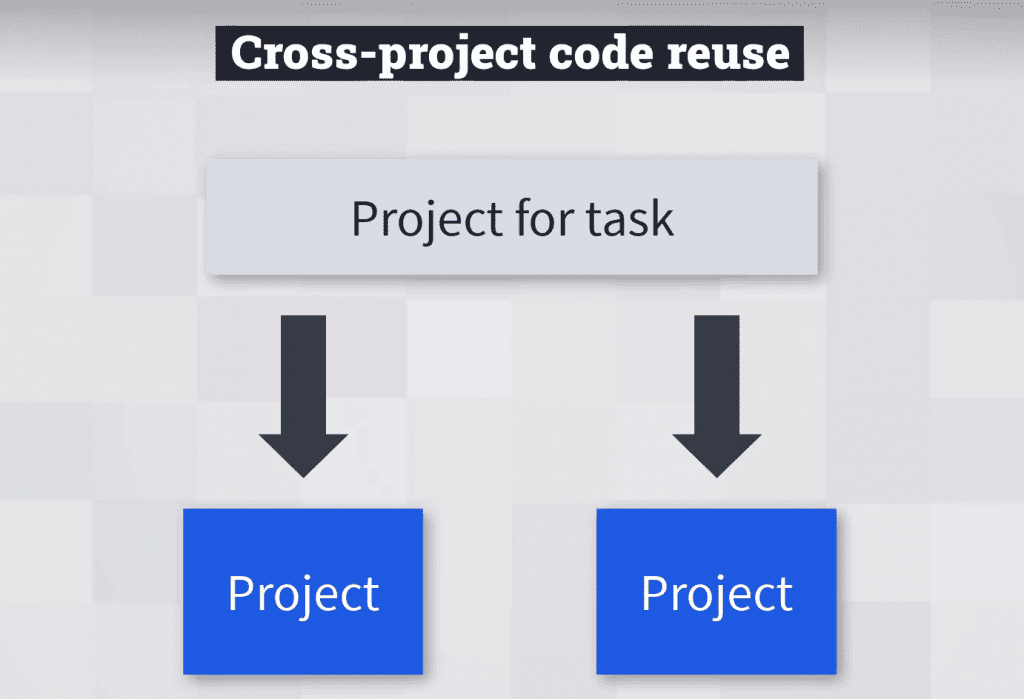
We could even take it a step further and turn it into a plugin, which much like with Maven, you can easily apply to any project to add certain behaviour.
There's a lot to unpack here, but if you're interested to learn more, there's a whole chapter devoted to Organizing Gradle projects effectively in my extremely helpful Gradle Build Bible. 🦸
Being able to more easily reuse build code in Gradle means less time working on your build, more time doing important work.
5. Improved developer experience
Using Gradle gives the developer an improved experience over Maven when it comes to the grind of day-to-day work.
As well as what we already discussed, there are some neat features incorporated into the Gradle command line.
Abbreviated task naes
Use abbreviated task names to save typing when running Gradle tasks. You can shorten:
-
./gradlew buildto./gradlew b -
./gradlew assembleto./gradlew a -
./gradlew bootJarMainClassNameto./gradlew bJMCN
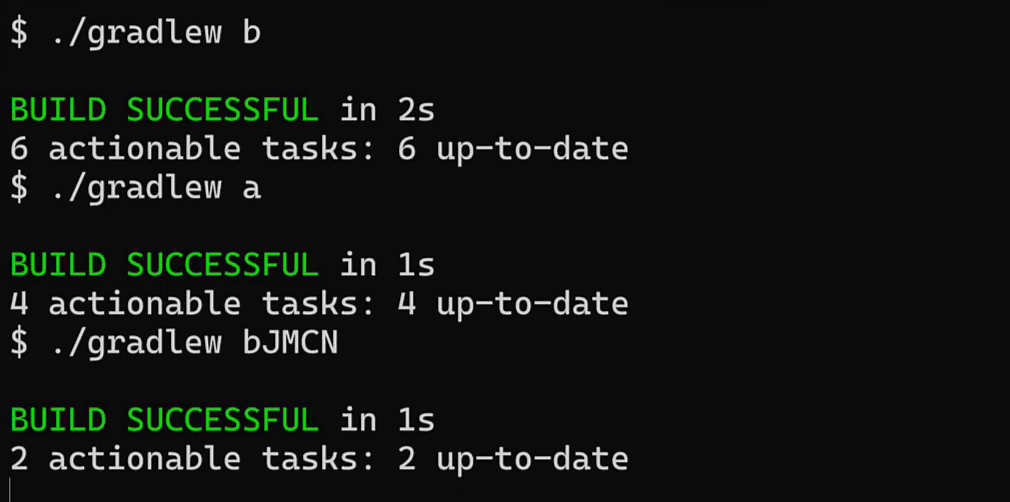
Just give enough of the task name so that it's unique
Console output
With Gradle the console output is a lot more succinct than Maven's. The default behaviour gives you a real-time view of what's currently running.

Easier to digest than pages of log output flying past!
Once completed, in the case of build success we get a single message. Or for a failure more detailed output.
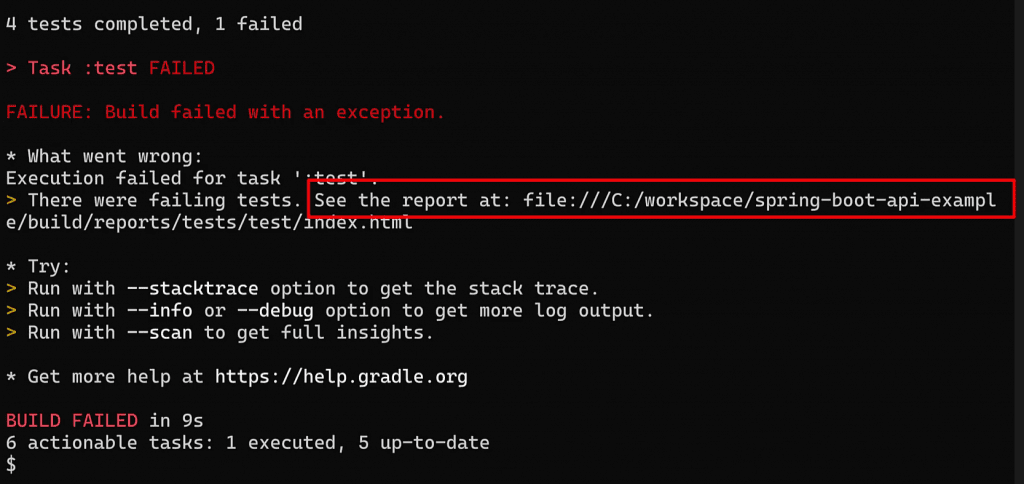
Troubleshooting
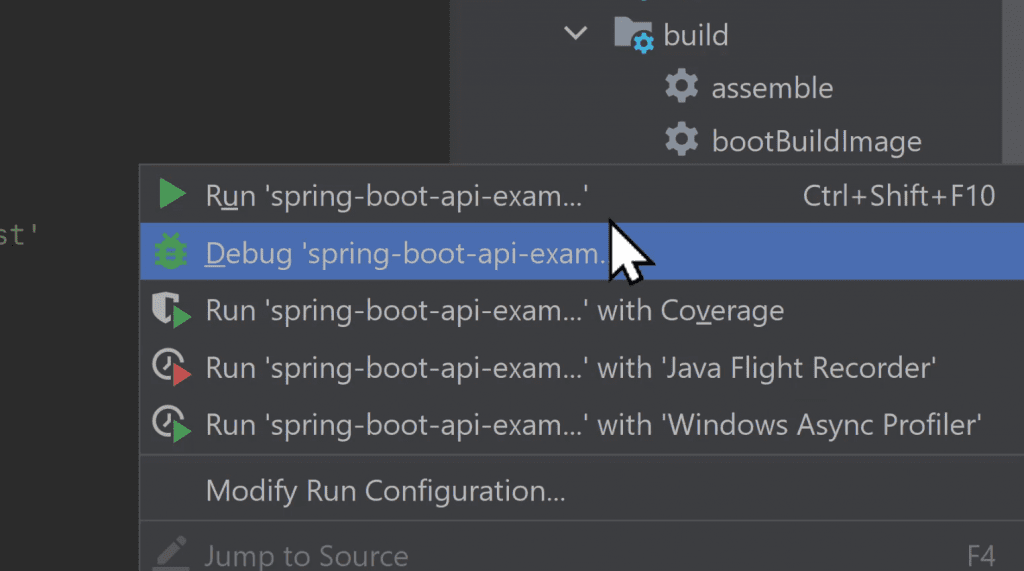
Unlike Maven, with Gradle you can debug the build script itself straight from the IDE.
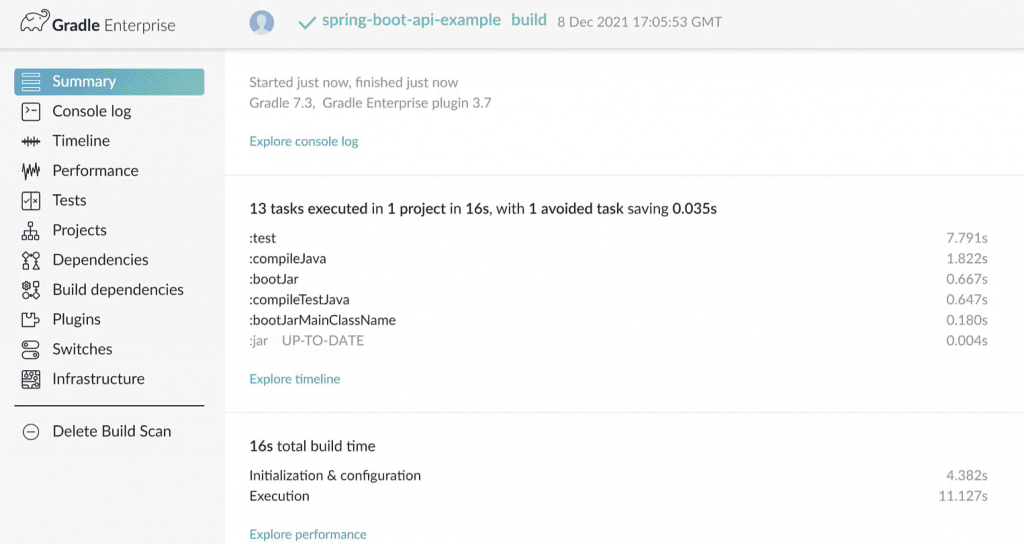
But perhaps most useful is the build scan you can generate by passing the --scan option.
This browser based report contains a build summary, a detailed account of your build's performance, a full dependency report, and much more.
This last point is a bit cheeky, as you can enable the build scan in Maven too with an extension built by Gradle.
<extensions>
   <extension>
       <groupId>com.gradle</groupId>
       <artifactId>gradle-enterprise-maven-extension</artifactId>
       <version>1.11.1</version>
   </extension>
</extensions>
Once included, Maven generates a similar report. Very useful for debugging builds or even migrating a project from Maven to Gradle!
Although we've only touched the surface here, hopefully you can see that all these features help to improve the developer experience.
This means less time working on your build, more time doing important work.
Final thoughts
The benefits of Gradle I've just outlined can be a game-changer for a project. If you're still not convinced, then see this in-depth Maven vs. Gradle comparison for more details.
And, if you want to continue learning about Gradle, then check out this Gradle tutorial for complete beginners.
Lack of Gradle knowledge slowing you down?
A broken build is easy enough to fix. But a misconfigured build is the silent time killer that costs hours every week.
Slow builds. Slow tests. Slow development.
But the official Gradle docs are confusing. Most developers never properly configure their projects—and as codebases grow, builds become bottlenecks.

This guide fixes that. It's a step-by-step walkthrough for Java developers who want to master Gradle fast.
- Unlock the mysteries of the build script.
- Speed up your workflow.
- Make development fun again.