How to Deploy Eureka into AWS ECS

To use the Eureka service discovery system in AWS ECS you need to setup your clients properly to register with Eureka and discover each other. In this article you'll learn the exact steps, following an example project with a Eureka server and 2 clients.
Eureka recap
The Eureka service discovery system lets microservices discover the location of other microservices via a central Eureka server. Microservices can then make requests directly to other microservices, without the need for a load balancer.
When a microservice configured to use Eureka starts up (also called a Eureka client), it follows these steps:
-
registers with the Eureka server, including it's name, IP address, and hostname (if available)
-
intermittently polls the Eureka server for information about other Eureka clients
-
makes requests to other Eureka clients directlu, using information from Eureka server

Each client caches client information retrieved from the Eureka server, so even if the Eureka server is unavailable communication can still continue between clients.
Eureka in AWS ECS
You might not know that AWS ECS actually already has a fully functional service discovery mechanism. This works through DNS entries that AWS keeps up to date with IP addresses of the individual ECS tasks.
So, for example, for microservice-a to call microservice-b is as simple as making a request to microservice-b.<namespace> where namespace is the name of the private DNS namespace you've setup.
But using Eureka instead is a valid option. In fact AWS even refer to this in their documentation.
A different approach to implementing service discovery is using third-party software such as HashiCorp Consul, etcd, or Netflix Eureka. All three examples are distributed, reliable key-value stores
But why would you choose to use Eureka when you could use AWS service discovery instead?
Well, you might:
-
have an existing system already integrated with Eureka that you need to deploy into AWS
-
want to integrate seamlessly with other Spring Cloud services like Zuul
You'll see shortly how to setup Eureka in AWS ECS, but first let's get an example working locally with Docker Compose.
Local Eureka & microsevice setup
To setup Eureka in ECS, it's important to first see it working locally. Why? It's a lot quicker to fix problems locally than in the cloud!
We'll follow these steps to create an example environment running in Docker using Docker Compose.
-
create a Eureka application (the Eureka service)
-
create 2 microservice applications (the Eureka clients)
-
build the application Docker images
-
setup a Docker compose environment
-
see communication between microservices via Eureka service discovery
Docker Compose 101: Docker Compose is an awesome tool that lets you define Docker containers and their configuration as a YAML template. You can then easily start a full environment with a single docker-compose up command.
Creating a Eureka server application
Spring have already documented well the process of setting up a Eureka server, but in summary it involves creating a Spring Boot application and adding the @EnableEurekaServer annotation from the spring-cloud-starter-netflix-eureka-server dependency.
package com.tomgregory.eurekaexample;

import org.springframework.boot.SpringApplication;
import org.springframework.boot.autoconfigure.SpringBootApplication;
import org.springframework.cloud.netflix.eureka.server.EnableEurekaServer;

@EnableEurekaServer
@SpringBootApplication
public class Eureka {
    public static void main(String[] args) {
        SpringApplication.run(Eureka.class);
    }
}
Based on the recommendations in the documentation, we specify the these properties in application.yml.
server:
  port: 8761
eureka:
  client:
    register-with-eureka: false
    fetch-registry: false
With just a few files, we then have a Eureka server which runs on port 8761.
Create microservice applications (a.k.a. Eureka clients)
Our setup will have 2 Eureka clients:
- eureka-client-a running on port
8081 - eureka-client-b running on port
8082
Each includes spring-cloud-starter-netflix-eureka-client on the classpath. That's all that's required to turn a Spring Boot application into a Eureka client. Simples!
In our case we also include the following application.yml to connect things up properly.
spring:
  application:
    name: eureka-client-a
server:
  port: 8081
eureka:
  client:
    serviceUrl:
defaultZone: http://localhost:8761/eureka- configure the application name, which is sent to the Eurekan server and used as a reference by other Eureka clients
- configure the application port. We'll run each application on different ports to avoid clashes.
- configure the location of the Eureka server (the defaultZone). This value will get overridden in the docker-compose.yml later.
Each Eureka client has 2 endpoints
/whoamiwhich returns the name of the microservice/callwhich calls the other Eureka client's/whoamiendpoint, using connection details provided by the Eureka server
To enable the call to the other Eureka client, we're using some cool functionality from spring-cloud-starter-openfeign. This lets us easily create a Java class for communication with another Eureka client, using the power of annotations.
Here's how that looks for the EurekaClientBClient.java in eureka-client-a.
package com.tomgregory.eurekaexample;

import org.springframework.cloud.openfeign.FeignClient;
import org.springframework.web.bind.annotation.RequestMapping;

@FeignClient("eureka-client-b")
public interface EurekaClientBClient {
    @RequestMapping("/whoami")
    String whoami();
}
To see the exact implementation, explore the code for the eureka-client-a and eureka-client-b projects.
Create the application Docker images
This is the simplest part, thanks to the fact that the Spring Boot Gradle plugin now builds the application into a Docker image.
We simply run ./gradlew bootBuildImage from the root of the project to generate the required images.
- eureka-server
- eureka-client-a
- eureka-client-b
Create a Docker Compose file
Here's the docker-compose.yml for our project.
services:
  eureka-server:
    image: eureka-server:latest
    ports:
      - "8761:8761"
    networks:
      - backend
  eureka-client-a:
    image: eureka-client-a:latest
    environment:
      EUREKA_CLIENT_SERVICEURL_DEFAULTZONE: "http://eureka-server:8761/eureka"
    ports:
      - "8081:8081"
    networks:
      - backend
  eureka-client-b:
    image: eureka-client-b:latest
    environment:
      EUREKA_CLIENT_SERVICEURL_DEFAULTZONE: "http://eureka-server:8761/eureka"
    ports:
      - "8082:8082"
    networks:
      - backend
networks:
backend:- the 3 applications are all registered to a backend network so they can communicate with each other by hostname
- the 2 Eureka clients configure the Eureka service URL
With this in place we can run docker-compose up to bring up the environment in a jiffy.
Verify the service discovery is working
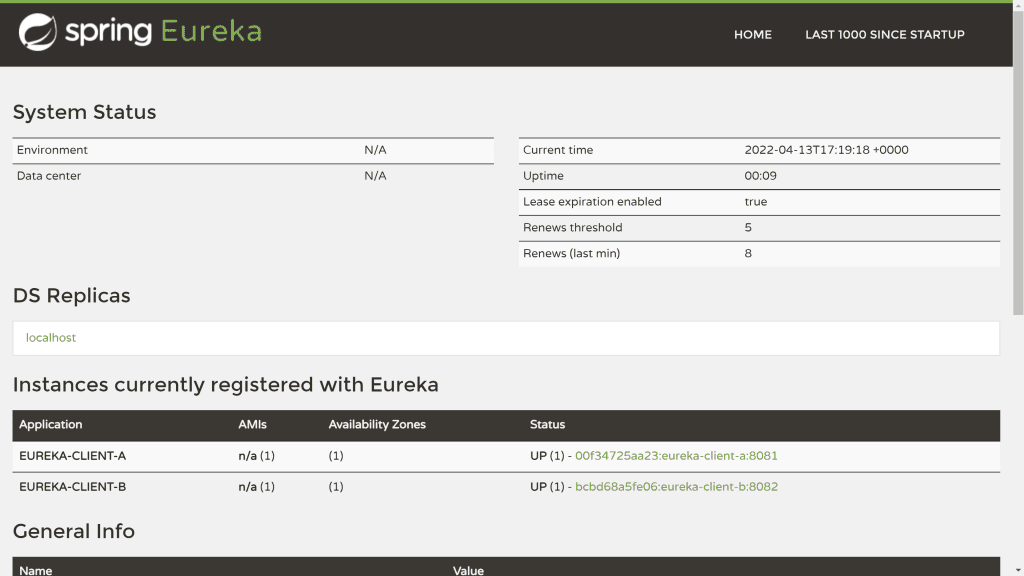
After some time the Eureka server is available at http://localhost:8761 and shows our 2 instances.

Now when we request /whoami on the 2 Eureka clients to get their identity:
-
http://localhost:8081/whoami returns "You are calling eureka-client-a!"
-
http://localhost:8082/whoami returns "You are calling eureka-client-b!"
And when we request /call to call the other Eureka client:
-
http://localhost:8081/call returns "You are calling eureka-client-b!"
-
http://localhost:8082/call returns "You are calling eureka-client-a!"
Which shows that each Eureka client is successfully calling /whoami on the other one. I love it when things just work!
Now that this is working locally in Docker comopse, it's going to be more straightforward to set this up in AWS ECS.
Give it some time: if you're following along with the example, and you get an error response for /call, be patient as in my experience the Eureka client doesn't pull the required information from the server immediately.
Deploying the Eureka environment to AWS ECS
It's time for the grand finale, to setup this environment in ECS using CloudFormation!
Read the steps below for a full understanding, then afterwards launch this stack yourself with this magic button. 👇
The rest of this article assumes you have a basic understanding of AWS ECS, so I won't be going into every single detail. To get all the details of the setup, you can reference the CloudFormation template.
CloudFormation deployment overview
The CloudFormation template creates the following resources:
- full network setup including VPC, subnets, internet gatweway, etc.
- ECS cluster
- ECS execution role (used by all 3 applications)
- ECS role (used by all 3 applications)
- CloudWatch log group
- Private DNS namespace
Then for each application (eureka-server, eureka-client-a, eureka-client-b) we have:
- security group
- service discovery service
- ECS task definition
- ECS service
Note that there's no load balancer. For simplicity we will deploy each ECS service into a public subnet and assign it a public IP. That way we can access eureka-server, eureka-client-a, and eureka-client-b over the internet by IP address.
Setup hostnames for all services
Remember earlier how I said an alternative approach to Eureka is to use ECS service discovery?
Well, we're going to use that feature anyway so that our Eureka clients can talk to the Eureka server and each other using a friendly hostname. Each application will have its own DNS entry which maps to its IP address.

The way this works is that you create a PrivateDnsNamespace which acts like a grouping for any private DNS entries you want to maintain.
  PrivateNamespace:
    Type: AWS::ServiceDiscovery::PrivateDnsNamespace
    Properties:
      Name: private
      Vpc: !GetAtt VPCStack.Outputs.VPC
In this case it has a name of private which will form part of the hostname.
Then for each service you want to be discoverable you add a ServiceDiscovery::Service. Here's how that looks for the Eureka server.
  EurekaDiscoveryService:
    Type: AWS::ServiceDiscovery::Service
    Properties:
      DnsConfig:
        RoutingPolicy: MULTIVALUE
        DnsRecords:
          - TTL: 60
            Type: A
          - TTL: 60
            Type: SRV
      Name: eureka
      NamespaceId: !Ref PrivateNamespace
The resource references the PrivateDnsNamespace resource and has a specific name. This forms the other part of the hostname.
Finally, in the AWS::ECS::Service definition we reference the ServiceDiscovery::Service so ECS can keep the DNS record up-to-date with the latest ECS task.
ServiceRegistries:
- RegistryArn: !GetAtt EurekaDiscoveryService.Arn Port: 8761
With this setup in a similar way for all 3 applications, we can access:
-
eureka on
eureka-server.private -
eureka-client-a on
eureka-client-a.private -
eureka-client-b on
eureka-client-b.private(you'd never have guessed!)
Configure the Eureka clients
Each Eureka client needs to be configured with the Eureka server URL and its own hostname. Since we've just setup both of these using ECS service discovery, we can easily reference these values in CloudFormation. Convenient, huh?
Here's how it looks for eureka-client-a within its ContainerDefinitions element.
          Environment:
            - Name: EUREKA_CLIENT_SERVICEURL_DEFAULTZONE
              Value: !Sub
                - 'http://${ServiceName}.${NamespaceName}:8761/eureka'
                - ServiceName: !GetAtt EurekaServerDiscoveryService.Name
                  NamespaceName: !Ref PrivateDnsNamespaceName
            - Name: EUREKA_INSTANCE_HOSTNAME
              Value: !Sub
                - '${ServiceName}.${NamespaceName}'
                - ServiceName: !GetAtt EurekaClientADiscoveryService.Name
                  NamespaceName: !Ref PrivateDnsNamespaceName
We're doing some clever stuff with the !Sub function to reduce duplication, but basiccally we're telling the application to:
-
access eureka on
http://eureka.private:8761/eureka -
set its own hostname to
eureka-client-a.private
Verify the deployment
Now we can apply the CloudFormation through the AWS Console, the AWS CLI, or by clicking the Launch stack button above.
Assuming it's successfully applied (what could go wrong?), we can see the 3 ECS tasks within the AWS console.

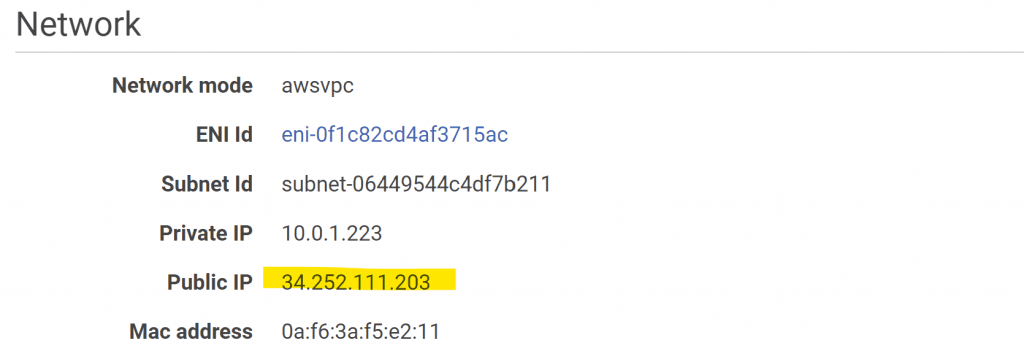
Clicking on a task id shows its details, including public IP address.

Let's first access the Eureka server dashboard at http://<\public-ip\>:8761. It shows the 2 Eureka client instances.

Hovering the cursor on one of the instances shows the hostname in the bottom-left corner. Yep, the one we setup earlier using ECS service discovery.
Let's access eureka-client-a at http://<private-ip>:8081/call. It returns the string from eureka-client-b, so everything's working!

And if we do the same for eureka-client-b at http://<private-ip>:8082/call, it's also working. Unbelievable!

Final thoughts
You've seen how to deploy a Eureka server into AWS ECS and configure Eureka clients to connect to it, using hostnames setup with ECS service discovery.
The provided CloudFormation template is just for demonstration purposes. If you're creating a Eureka setup for a production environment you'll want to make sure to:
-
setup security groups for each Eureka server/client with the minimum required network access
-
hide Eureka server/client from the internet by removing the public IP address or deploying to a private subnet
Finally, don’t forget to delete the example CloudFormation stack when you’re done to avoid any unnecessary charges.
