JAVA_HOME vs. PATH Environment Variables

To compile and run Java applications successfully you'll need to setup the JAVA_HOME and PATH environment variables. In this article you'll learn what these variables do, when to use each of them, and how to set them up properly on your Windows system.
What is PATH used for?
The PATH environment variable consists of a list of directories containing executable programs on your system. In Windows, these programs are files which end in .exe. By including a program's directory in PATH it becomes available to use on the command line by name, without having to specify its full path.
So for easy access to a program, add the directory that contains it to the PATH. Let's see how that works so we can run programs contained within the Java Development Kit (JDK).
An example
Here's a snippet of my PATH environment variable.
C:\\Program Files\\NVIDIA Corporation\\NVIDIA NvDLISR;C:\\Program Files\\Amazon\\AWSCLIV2\\;**C:\\Java\\jdk-17.0.2\\bin;**
It includes an entry for C:\Java\jdk-17.0.2\bin, my JDK installation. In fact, it points to the bin directory containing Java programs such as:
-
java(for running Java) -
javac(for compiling Java) -
jar(for packaging Java jar archives)
What effect does having this on the PATH have?
It means I can run any Java command contained in the bin directory from the Windows Command Prompt, simply by specifying the command name.

Yes, even though I'm in my user home directory, I can use the java program as though it were in this directory by just running java --version.
And that's all thanks to the PATH environment variable.
What happens when Java is not on PATH?
If I remove Java from PATH something catastrophic happens. 💥
OK, maybe not that bad, but we do get an error when trying to run java.

That's because Windows doesn't know where to find the java command.
If we want, we can instead run java using its full path. In my case that's:
C:\\Java\\jdk-17.0.2\\bin\\java --version
A bit of a mouthfull right? Much better to setup PATH instead.
OK...so we nailed PATH. Why on earth do we need JAVA_HOME as well then?
What is JAVA_HOME used for?
The JAVA_HOME environment variable is set to the JDK installation directory. The variable can then be used by any program that needs access to the JDK.
You can think of JAVA_HOME as a pointer. Any time you start a program that relies on the JDK in some way, the program uses that pointer to find it.
An example
I'll set JAVA_HOME to C:\Java\jdk-17.0.2 and then we'll try running a program that uses it.
The popular build automation tool Gradle uses JAVA_HOME to locate the JDK. When we run gradle --version, we see in the output that it's found the version of Java we set in JAVA_HOME.

Many other programs use JAVA_HOME in a similar way e.g. Maven, Eclipse.
What happens when JAVA_HOME is not set?
If JAVA_HOME isn't set then programs that rely on it might not be able to locate the JDK. In the worst case scenario this will stop the program from executing. 🤚
When we run the same Gradle command, we get an error JAVA_HOME is not set.

Do we need to set both JAVA_HOME and PATH?
Some modern programs are intelligent enough to extract the JDK location from PATH if JAVA_HOME is not set. For example, with Gradle you can set either PATH or JAVA_HOME and it will run fine.
Other programs, such as the Eclipse IDE, need at least the PATH in order to startup.
For the best compatibility with new and old programs that use Java always set both JAVA_HOME and PATH.
If you're concerned about maintaining two environment variables, you can actually reference one from the other, as you're about to see.
How to set JAVA_HOME and PATH in Windows
Hopefully by now you're convinced to set JAVA_HOME and PATH to compile and run Java on your system.
But how do you actually set them up in Windows?
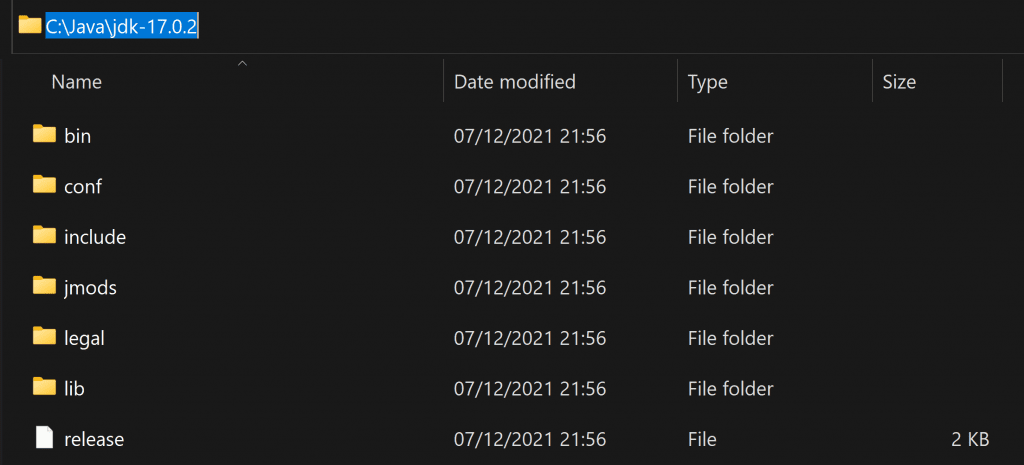
First you need to locate your JDK installation. If you haven't installed the JDK yet, download it from jdk.java.net and extract it into your directory of choice.
In Windows explorer, locate the JDK installation directory and copy the location from the address bar.

Now press Start, type Environment, and select Edit the system environment variables.

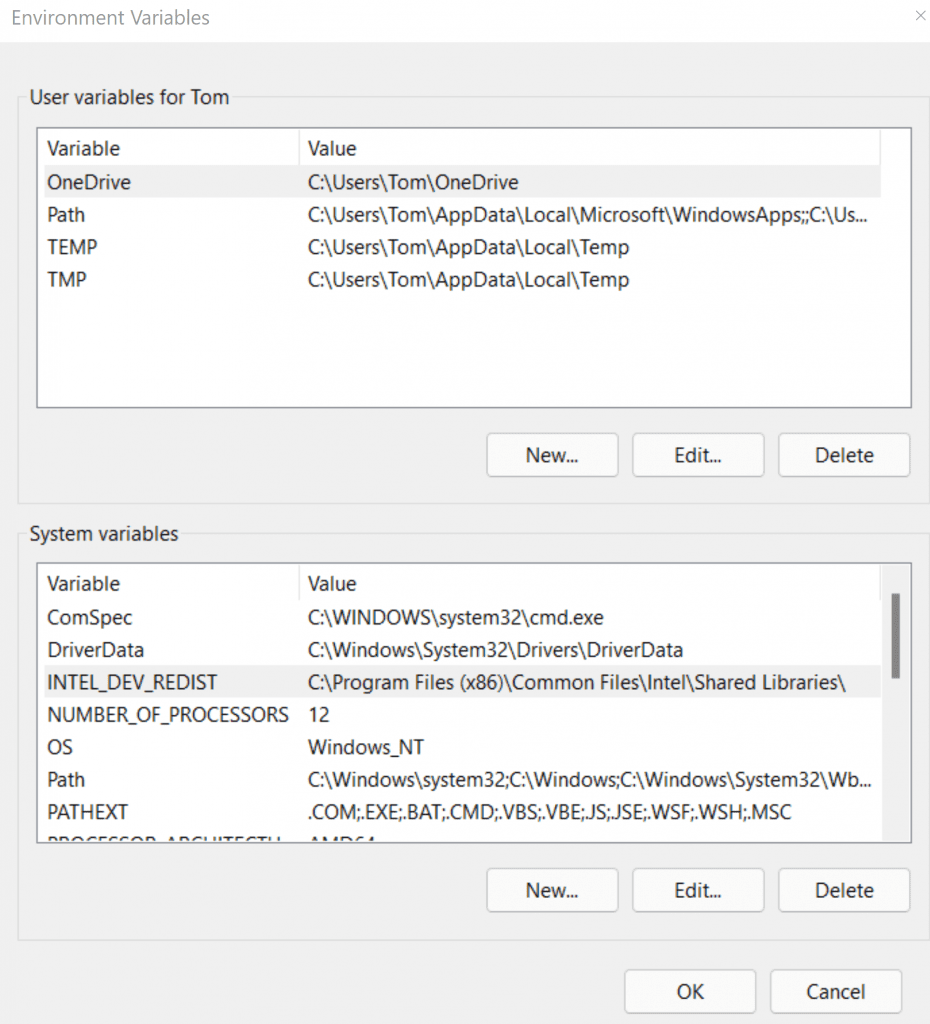
On the dialog that appears, select Environment Variables at the bottom.
The Environment Variables dialog appears, which is the main place from which we control environment variables in Windows. Yeah, like mission control but without the colourful buttons.

Adding JAVA_HOME
We'll first create JAVA_HOME. Select New under System variables to create a system variable which will be available to any user on your system.
In the dialog that appears, set a Variable name of JAVA_HOME and for Variable value paste the JDK directory location you copied earlier.
Hit OK.

That's JAVA_HOME added. Awesome!
Adding Java to PATH
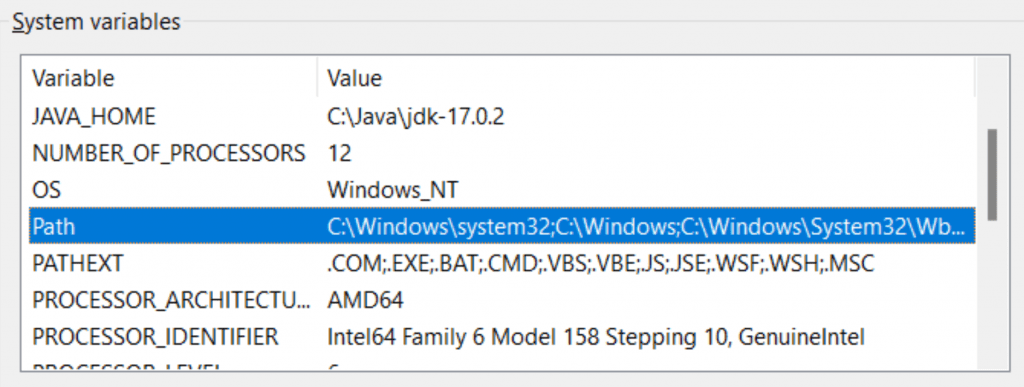
Back on the Environment Variables dialog we're going to edit the system variable called Path.

Yeah I know, I've been calling it PATH instead of Path up to this point. But actually Windows environment variables aren't case sensitive, so no worries!
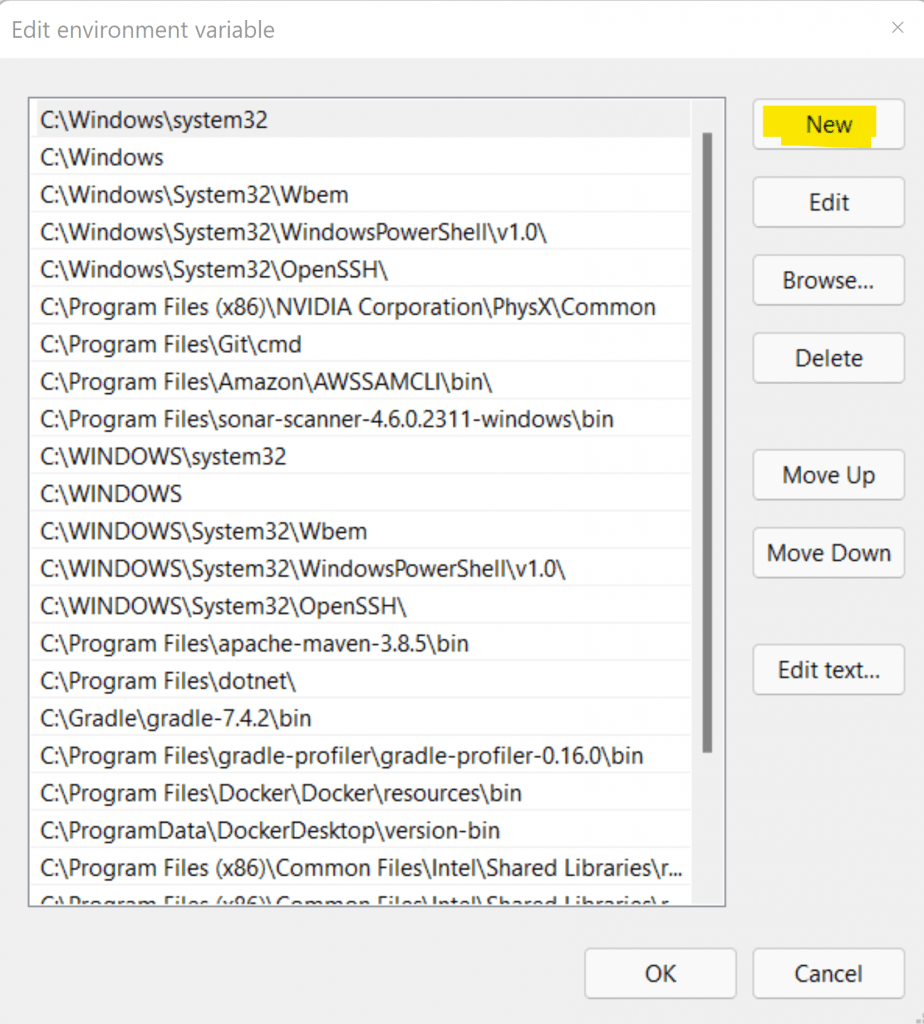
Double click Path and it will bring up a list of all the directories contained in the variable. We need to add a new entry so hit New.

You'll end up in a text box where you should enter the value %JAVA_HOME%\bin. This references the JAVA_HOME variable so we don't repeat the same information twice.

Hit OK, then on the Environment Variables dialog hit OK again to save your changes.
How to check that JAVA_HOME and PATH are setup correctly
Now that you've setup the two Java-related environment variables, start a new Windows Command Prompt to test them out.
-
to validate
PATHrunjava --version. You should see Java version information printed on your screen. -
to validate
JAVA_HOMErunecho %JAVA_HOME%. You should see the location of your JDK installation.

Now you can try running your favourite Java program and everything should work perfectly.
Final thoughts
You now understand the difference between the JAVA_HOME and PATH environment variables, how they're used, and how to set them up so you can compile and run Java programs on your system.
Remember that you've setup PATH to reference JAVA_HOME, so whenever you need to update Java you only need to change one value.
Now you've crossed this off the list it's time to start building some Java applications. The fastest and most powerful Java build tool available right now is Gradle. Check out the free course and tutorials I made just for you below. 👇
Watch this video demonstrating the ideas from this article.
If this is a problem you're dealing with in your own team, you can see how I approach software delivery in practice.