Deploying Jenkins into AWS ECS using CDK

In the article Deploy your own production-ready Jenkins in AWS ECS a sample CloudFormation template was provided, taking away much of the heavy lifting. Still, the CloudFormation template was verbose and potentially difficult to understand.
In this article, you'll learn how to deploy a production-ready Jenkins instance in just a few lines of code, using the power of the AWS Cloud Development Kit (CDK).
AWS CDK overview
AWS CDK is a framework designed to address some of the shortcomings of CloudFormation. The 3 main benefits in using this framework are:
-
infrastructure-as-code (not YAML) - CloudFormation is defined in a YAML template, which describes the end state of your infrastructure. Writing these templates by hand is liable to repetition and inflexibility. With CDK you define your infrastructure in code, then the framework generates a CloudFormation template for you.
-
high-level constructs - when writing CloudFormation you have to explicitly define every AWS resource, including any associated resources, such as IAM roles and security groups. CDK works with higher level constructs which can encapsulate multiple AWS resources. You can also write your own constructs to encapsulate your specific build logic.
-
sensible defaults - CDK is more opinionated than CloudFormation, choosing sensible defaults when it can. For example, creating an ECS task definition also automatically creates the required task execution role.
In simple terms, CDK is a tool for dynamically generating CloudFormation through code, adding in a lot of best-practices along the way.
If you want to follow along with the examples in this article, you'll need npm and cdk installed on your machine, so check out this getting started guide.
Jenkins architecture
We're going to be deploying this Jenkins master architecture into AWS.

This architecture provides a Jenkins master with secure access from the internet, with persistent storage, and automatic failover to another availability zone in case of disaster. Importantly, this solution is also serverless as it runs in AWS Fargate. Full details of the architecture are described in Deploy your own production-ready Jenkins in AWS ECS.
To create the above architecture, we'll need to create following AWS resources.
Networking resources
-
VPC - the network into which we'll deploy Jenkins
-
2 public and 2 private subnets - Jenkins will be deployed to one of two private subnets, each in a different availability zones
-
an internet gateway - the connection from our VPC to the internet
-
2 NAT gateways - allowing access from the private subnets to the internet gateway (one in each public subnet)
Jenkins-specific resources
-
ECS task definition - describes the Jenkins container
-
ECS service - ensures we always have 1 running Jenkins ECS task
-
load balancer, load balancer listener, and target group - exposes the Jenkins service to the internet
-
Route53 record - (optional) makes the load balancer available on a user-friendly domain
-
security groups - limits network access to the minimum required
-
IAM roles - limits Jenkins AWS access to only the required permissions
Jenkins deployment with CDK
The full project is available to download and run from the jenkins-hero/aws-cdk-examples GitHub repository. Before you do that though, let's run through this implementation step-by-step so you understand what will get deployed and how.
Jenkins CDK infrastructure definition
The CDK app is called jenkins-master, and is written in the TypeScript language. The file containing all the deployment details is jenkins-master-stack.ts, which we're going to step through
Imports and setup
We're going to use several different CDK modules, each of which represents an area of AWS e.g. @aws-cdk/aws-ecs.
The import statements make these modules available to us within the declared JenkinsMasterStack class, shown below.
This class contains all our AWS CDK object definitions, which will later get used to generate a CloudFormation template to be applied to an AWS account.
import * as cdk from '@aws-cdk/core';
import {Duration, RemovalPolicy} from '@aws-cdk/core';
import * as ecs from '@aws-cdk/aws-ecs';
import * as ec2 from '@aws-cdk/aws-ec2';
import {Port} from '@aws-cdk/aws-ec2';
import * as efs from '@aws-cdk/aws-efs';
import * as elbv2 from '@aws-cdk/aws-elasticloadbalancingv2';
import * as route53 from '@aws-cdk/aws-route53';
import {HostedZone} from '@aws-cdk/aws-route53';
export class JenkinsMasterStack extends cdk.Stack {
    constructor(scope: cdk.App, id: string, props?: cdk.StackProps) {
        super(scope, id, props);
        // everything else shown below
    }
}
VPC
Creating a VPC is super-simple in CDK. It also creates public and private subnets, internet gateways, and NAT gateways. Like I said, sensible defaults 👍.
        const vpc = new ec2.Vpc(this, 'jenkins-vpc', {
            cidr: "10.0.0.0/16"
        })
ECS cluster
We define an ECS cluster named jenkins-cluster.
        const cluster = new ecs.Cluster(this, 'jenkins-cluster', {
            vpc,
            clusterName: 'jenkins-cluster'
        });
EFS filesystem
The Elastic File System (EFS) setup includes the actual EFS AWS resource, plus an access point with the correct path and access configuration. In the background CDK also creates the necessary mount targets, which are the IP addresses used for access to the filesystem, plus the related security groups.
        const fileSystem = new efs.FileSystem(this, 'JenkinsFileSystem', {
            vpc: vpc,
            removalPolicy: RemovalPolicy.DESTROY
        });

        const accessPoint = fileSystem.addAccessPoint('AccessPoint', {
            path: '/jenkins-home',
            posixUser: {
                uid: '1000',
                gid: '1000',
            },
            createAcl: {
                ownerGid: '1000',
                ownerUid: '1000',
                permissions: '755'
            }
});ECS task definition
The task definition describes how the Jenkins ECS task will get run, including:
-
memory & CPU requirements
-
adding a volume, based on the EFS filesystem created above
-
adding a container definition, describing attributes of the Docker container such as the image, exposed port, and logging setup
-
mounting the volume inside the container at the location Jenkins expects
/var/jenkins_home
        const taskDefinition = new ecs.FargateTaskDefinition(this, 'jenkins-task-definition', {
            memoryLimitMiB: 1024,
            cpu: 512,
            family: 'jenkins'
        });

        taskDefinition.addVolume({
            name: 'jenkins-home',
            efsVolumeConfiguration: {
                fileSystemId: fileSystem.fileSystemId,
                transitEncryption: 'ENABLED',
                authorizationConfig: {
                    accessPointId: accessPoint.accessPointId,
                    iam: 'ENABLED'
                }
            }
        });
        const containerDefinition = taskDefinition.addContainer('jenkins', {
            image: ecs.ContainerImage.fromRegistry("jenkins/jenkins:lts"),
            logging: ecs.LogDrivers.awsLogs({streamPrefix: 'jenkins'}),
            portMappings: [{
                containerPort: 8080
            }]
        });
        containerDefinition.addMountPoints({
            containerPath: '/var/jenkins_home',
            sourceVolume: 'jenkins-home',
            readOnly: false
        });
ECS service definition
The service in this case is a FargateService and we configure how many Jenkins instances we need to run.
Importantly, we also enforce a maximum of 1 Jenkins master to run at the same time, to prevent any unexpected behaviour with multiple Jenkins masters accessing the same filesystem.
To enable Jenkins to access the file system, the last line below sets up a security group rule between the security group of the ECS service and that of the EFS file system. CDK automatically adds the relevant rules to both security groups, helpfully solving a common headache.
        const service = new ecs.FargateService(this, 'JenkinsService', {
            cluster,
            taskDefinition,
            desiredCount: 1,
            maxHealthyPercent: 100,
            minHealthyPercent: 0,
            healthCheckGracePeriod: Duration.minutes(5)
        });
        service.connections.allowTo(fileSystem, Port.tcp(2049));
Load balancer
This section creates the load balancer and registers our ECS service with it.
-
we optionally execute this section based on the presence of the
certificateArncontext value (see below for what these are) -
we create a load balancer and create a CloudFormation stack output containing its DNS name, for easy access
-
a load balancer listener is created with the passed in
certificateArn -
we create a target group, specifying the target as the ECS service. CDK implicitly understands this and does the necessary configuration in the background.
        let certificateArn = this.node.tryGetContext('certificateArn');
        if (certificateArn) {
            const loadBalancer = new elbv2.ApplicationLoadBalancer(this, 'LoadBalancer', {vpc, internetFacing: true});
            new cdk.CfnOutput(this, 'LoadBalancerDNSName', {value: loadBalancer.loadBalancerDnsName});

            const listener = loadBalancer.addListener('Listener', {
                port: 443,
                certificateArns: [certificateArn]
            });
            listener.addTargets('JenkinsTarget', {
                port: 8080,
                targets: [service],
                deregistrationDelay: Duration.seconds(10),
                healthCheck: {
                    path: '/login'
                }
            });

            // hosted zone registration
        }
Context values
In CDK context values are key/value pairs which can be associated with a stack.
They can be passed on the cdk command with --context <key>=<value>, which you'll see later on when we get to the deployment stage.
Hosted zone
This final section registers the load balancer into DNS, so Jenkins can be accessed on a friendly URL.
-
we optionally execute this based on whether the
hostedZoneNamecontext value has been passed -
we lookup the hosted zone from the hosted zone name
-
we create a new Route 53 CNAME record, using a record name of
jenkins. This means that for a hosted zone namedtomgregory.com, Jenkins is accessible onjenkins.tomgregory.com.
            const hostedZoneName = this.node.tryGetContext('hostedZoneName')
            if (hostedZoneName) {
                const hostedZone = HostedZone.fromLookup(this, 'HostedZone', {
                    domainName: hostedZoneName
                });
                new route53.CnameRecord(this, 'CnameRecord', {
                    zone: hostedZone,
                    recordName: 'jenkins',
                    domainName: loadBalancer.loadBalancerDnsName,
                    ttl: Duration.minutes(1)
                });
            }
Deploying the Jenkins CDK stack
At this point we're almost ready to deploy the CDK app into AWS.
First, we need to ensure the following environment variables are available to tell CDK where we're deploying to:
-
CDK_DEFAULT_ACCOUNT=<aws-account-id> -
CDK_DEFAULT_REGION=<aws-region>
And we need to determine what values to pass for these context values:
-
certificateArn is the ARN of a Certificate Manager certificate to be attached to the load balancer listener. If this isn't provided you won't be able to access your Jenkins instance.
-
hostedZoneName (optional) is the name of a Route 53 hosted zone into which a
jenkinsCNAME record will be added e.g. set totomgregory.comto register a CNAME recordjenkins.tomgregory.compointing at the load balancer DNS name. If this context value is omitted, you can always access Jenkins on the load balancer DNS name.
First we need to installs the required packages:
npm installAnd then we can do the deployment:
cdk deploy --context certificateArn=<certificate-arn> --context hostedZoneName=<hosted-zone-name>This performs the following steps:
- builds our application
- generates a CloudFormation template
- deploys the CloudFormation template as a change set into the configured AWS account
- waits until the CloudFormation stack has been created
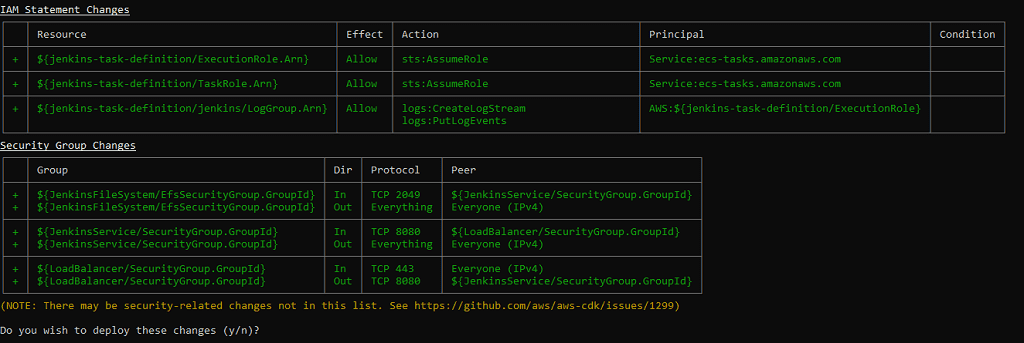
When you see this confirmation dialog enter y.

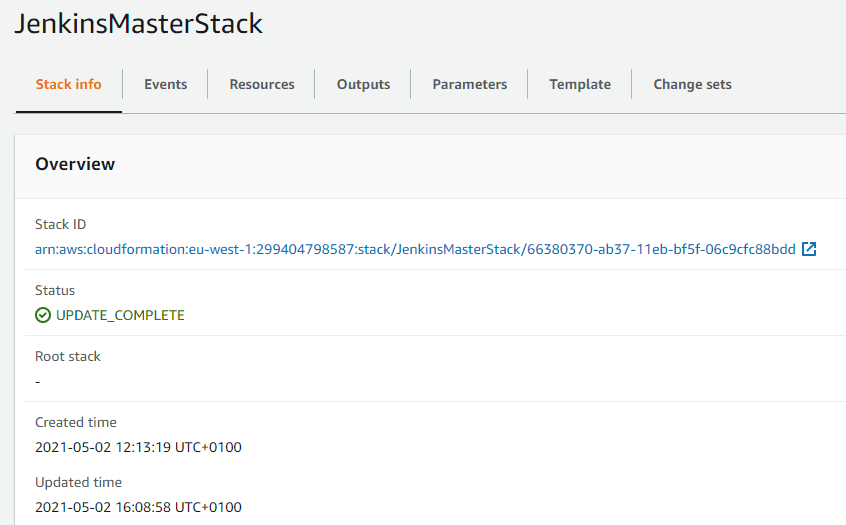
After a few minutes the deployment should succeed. Within the CloudFormation area of the AWS Console the JenkinsMasterStack will show in a completed status.

Accessing Jenkins
Jenkins will be available at https://jenkins.<your-hosted-zone-name>. If you didn't provide a HostedZoneId you can access Jenkins at the load balancer's DNS name, which you can get from the CloudFormation stack output named LoadBalancerDNSName.
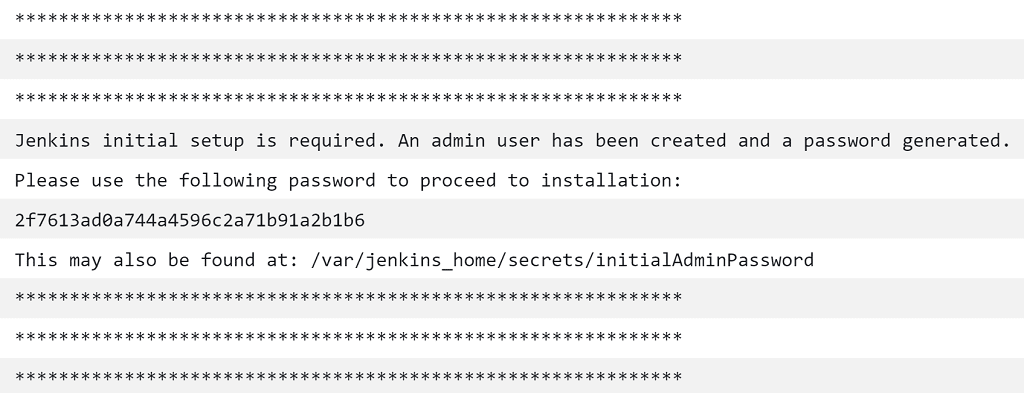
To get the initial password required for login, you can view the ECS task logs from the ECS dashboard, or view the equivalent logs in CloudWatch logs.

Once you've logged into Jenkins and gone through the setup wizard, you can go ahead and create jobs. You can also test that the Jenkins data is persisting as expected by killing the ECS task, waiting for a new one to spawn, then verifying that your data is still available.
Jenkins CDK vs. CloudFormation deployment
Let's compare the volume of code required for the Jenkins CDK deployment to the CloudFormation version used in Deploy your own production-ready Jenkins in AWS ECS.
-
the CDK deployment jenkins-master-stack.ts file has 115 lines
-
the equivalent CloudFormation stack has 230 lines
CDK is the clear winner here, requiring 50% fewer lines of code to achieve the same outcome!
Final thoughts
Don't forget to tear down your CloudFormation stack to avoid unnecessary charges, which you can do from the CloudFormation console or by issuing this command.
cdk destroy --context certificateArn=<certificate-arn> --context hostedZoneName=<hosted-zone-name>Pass in the same context parameters you used for the deploy command, so that CDK knows what needs to be deleted.
You've just seen how to deploy a Jenkins master into AWS ECS using CDK, which makes light work of what would otherwise be a complex deployment.
If this is a problem you're dealing with in your own team, you can see how I approach software delivery in practice.