Add SonarQube quality gates to your Jenkins build pipeline

Rather than manually analysing the reports, why not automate the process by integrating SonarQube with your Jenkins continuous integration pipeline? This way, you can configure a quality gate based on your own requirements, ensuring bad code always fails the build.
You'll learn exactly how to do that in this article, through a full worked example where we add SonarQube analysis and SonarQube quality gate stages to a Jenkins pipeline.
- a Jenkins pipeline is started
- the SonarQube scanner is run against a code project, and the analysis report is sent to SonarQube server
- SonarQube finishes analysis and checking the project meets the configured Quality Gate
- SonarQube sends a pass or failure result back to the Jenkins webhook exposed by the plugin
- the Jenkins pipeline will continue if the analysis result is a pass or optionally otherwise fail
Full worked example
Let's get our hands dirty with a worked example. We'll run through all the steps in the UI manually as this is the best way to understand the setup.
In this example we'll:
- get Jenkins and SonarQube up and running
- install the SonarQube Scanner Jenkins plugin and configure it to point to our SonarQube instance
- configure SonarQube to call the Jenkins webhook when project analysis is finished
- create two Jenkins pipelines
- one that runs against a codebase with zero issues (I wish all my code was like this 😉)
- one that runs against a codebase with bad code issues
- run the pipelines and see it all working
You'll need to make sure you have Docker installed before carrying on.
Running Jenkins and SonarQube
What better way to start these two services than with Docker Compose? Create the following file docker-compose.yml:
version: "3"
services:
  sonarqube:
    image: sonarqube:lts
    ports:
      - 9000:9000
    networks:
      - mynetwork
    environment:
      - SONAR_FORCEAUTHENTICATION=false
  jenkins:
    image: jenkins/jenkins:2.319.1-jdk11
    ports:
      - 8080:8080
    networks:
      - mynetwork
networks:
mynetwork:- we're configuring two containers in Docker Compose: Jenkins and SonarQube
- the Docker images used come from the official repositories in Docker Hub
- we're adding both containers to the same network so they can talk to each other
- for demo purposes SonarQube authentication is disabled so Jenkins won't need to pass a token
Running docker-compose up in the directory containing the file will start Jenkins on http://localhost:8080 and SonarQube on http://localhost:9000. Awesomeness!
Configuring the SonarQube Scanner Jenkins plugin
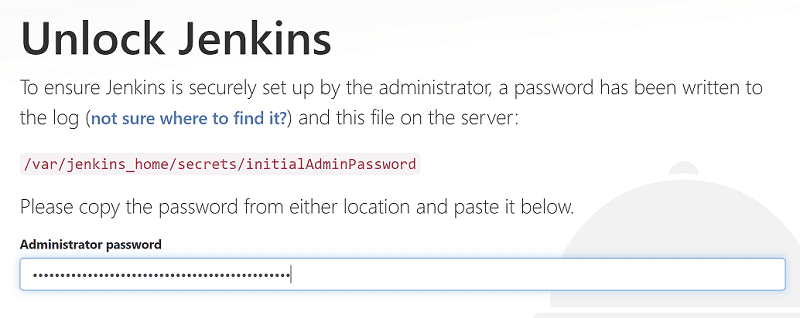
Grab the Jenkins administrator password from the Jenkins logs in the console output of the Docker Compose command you just ran.
jenkins_1    | Please use the following password to proceed to installation:
jenkins_1    |
jenkins_1    | 7efed7f025ee430c8938beaa975f5dde
Head over to your Jenkins instance and paste in the password.
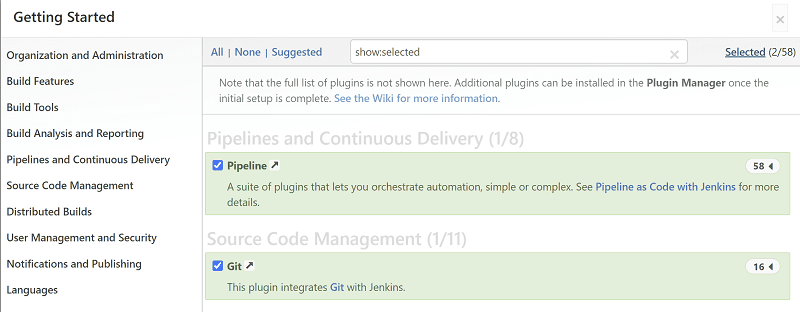
On the next page choose Select plugins to install and install only the pipeline and git plugins. The SonarQube Scanner plugin we'll have to install afterwards since this Getting Started page doesn't give us the full choice of plugins.
In the final steps you'll have to create a user and confirm the Jenkins URL of http://localhost:8080.
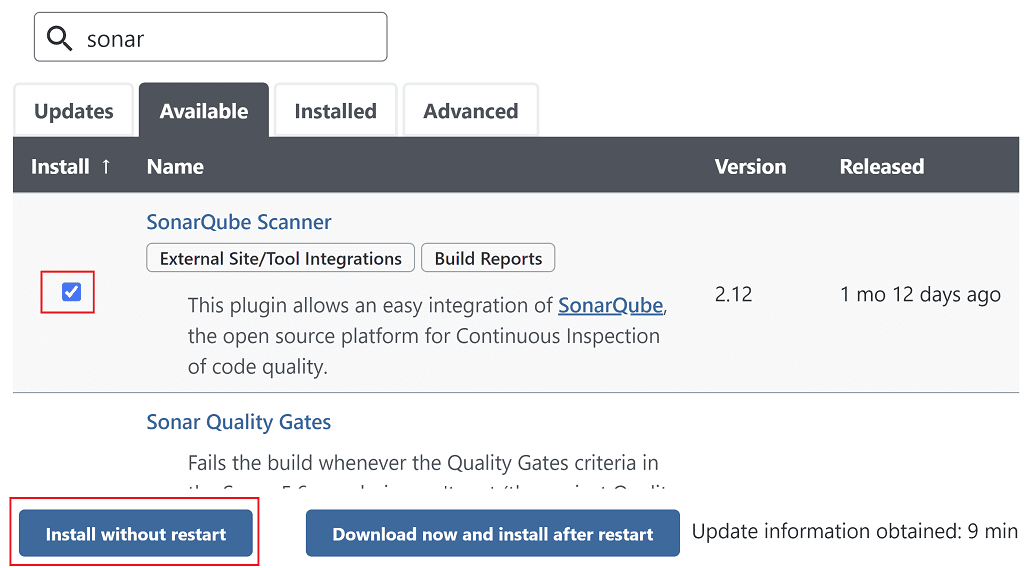
Once complete head over to Manage Jenkins > Manage Plugins > Available and search for sonar. Select the SonarQube Scanner plugin and click Install without restart.
Once the plugin is installed, let's configure it!
Go to Manage Jenkins > Configure System and scroll down to the SonarQube servers section. This is where we'll add details of our SonarQube server so Jenkins can pass its details to our project's build when we run it.
Click the Add SonarQube button. Now add a Name for the server, such as SonarQube. The Server URL will be http://sonarqube:9000. Remember to click Save.

Configuring SonarQube
Let's jump over to SonarQube. Click Log in at the top-right of the page, and log in with the default credentials of admin/admin. You'll then have to set a new password.
Now go to Administration > Configuration > Webhooks. This is where we can add webhooks that get called when project analysis is completed. In our case we need to configure SonarQube to call Jenkins to let it know the results of the analysis.
Click Create, and in the popup that appears give the webhook a name of Jenkins, set the URL to http://jenkins:8080/sonarqube-webhook and click Create.

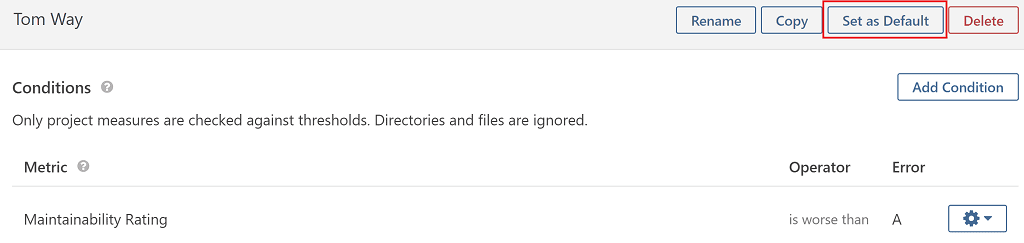
Finally click Set as Default at the top of the page to make sure that this quality gate will apply to any new code analysis.
Creating Jenkins pipelines
Last thing to do is setup two Jenkins pipelines:
- A pipeline which runs against a code project over at the sonarqube-jacoco-code-coverage GitHub repository. The code here is decent enough that the pipeline should pass.
- A pipeline which runs against the same project, but uses the bad-code branch. The code here is so bad that the pipeline should fail.
Good code pipeline
Back in Jenkins click New Item and give it a name of sonarqube-good-code, select the Pipeline job type, then click OK.
Scroll down to the Pipeline section of the configuration page and enter the following declarative pipeline script in the Script textbox:
pipeline {
    agent any

    stages {
        stage('Clone sources') {
            steps {
                git url: 'https://github.com/tkgregory/sonarqube-jacoco-code-coverage.git'
            }
        }

        stage('SonarQube analysis') {
            steps {
                withSonarQubeEnv('SonarQube') {
                    sh "./gradlew sonarqube"
                }
            }
        }
        stage("Quality gate") {
            steps {
                waitForQualityGate abortPipeline: true
            }
        }
    }
}
The script has three stages:
- in the Clone sources stage code is cloned from the GitHub repository mentioned earlier
- in the SonarQube analysis stage we use the
withSonarQubeEnv('Sonarqube')method exposed by the plugin to wrap the Gradle build of the code repository. This provides all the configuration required for the build to know where to find SonarQube. Note that the project build itself must have a way of running SonarQube analysis, which in this case is done by running./gradlew sonarqube. - in the Quality gate stage we use the
waitForQualityGatemethod exposed by the plugin to wait until the SonarQube server has called the Jenkins webhook. TheabortPipelineflag means if the SonarQube analysis result is a failure, we abort the pipeline.
Click Save to save the pipeline.
Bad code pipeline
Create another pipeline in the same way, but name it sonarqube-bad-code. The pipeline script is almost exactly the same, except this time we need to check out the bad-code branch of the same repository.
pipeline {
    agent any

    stages {
        stage('Clone sources') {
            steps {
                git branch: 'bad-code', url: 'https://github.com/tkgregory/sonarqube-jacoco-code-coverage.git'
            }
        }

        stage('SonarQube analysis') {
            steps {
                withSonarQubeEnv('SonarQube') {
                    sh "./gradlew sonarqube"
                }
            }
        }
        stage("Quality gate") {
            steps {
                waitForQualityGate abortPipeline: true
            }
        }
    }
}- in the Clone sources stage we're now also specifying the
branchattribute to point to the bad-code branch
Again, click Save.
You should now have two Jenkins jobs waiting to be run.

Any guesses as to what we're going to do next?
SonarQube analysis and quality gate stages in action
Yes, that's right, now it's time to run our pipelines! ✅
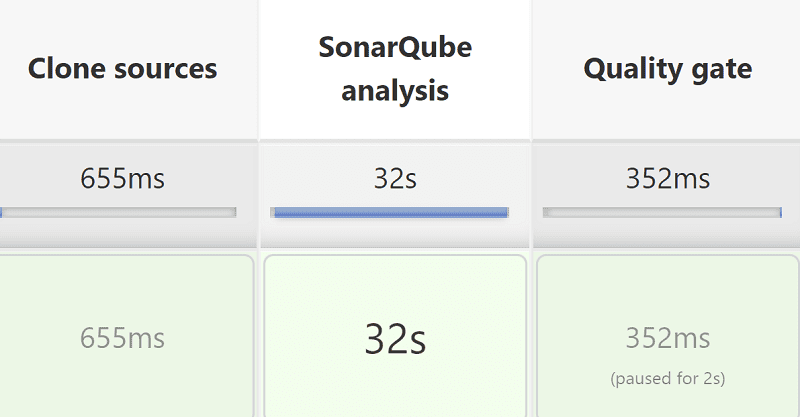
Let's run the sonarqube-good-code pipeline first.
You should get a build with all three stages passing.

Final thoughts
You've seen that integrating SonarQube quality gates into Jenkins is straightforward using the SonarQube Scanner Jenkins plugin. To apply this to a production setup, I suggest also to:
- remove the
SONAR_FORCEAUTHENTICATIONenvironment variable from SonarQube & configure the webhook in Jenkins to require an authentication token (see the SonarQube Scanner plugin configuration) - consider running SonarQube analysis on feature branches, so developers get early feedback on whether their code changes are good before merging into master. However, multi-branch analysis does require a paid subscription to SonarQube.
Resources
- the sonarqube-jenkins-example repository includes the example outlined in this article. Most of the manual steps from this article have been automated through configuration-as-code. All you need to do is configure SonarQube as described in the Configuring SonarQube section.
- the SonarQube Scanner Jenkins plugin documentation has some useful details
If this is a problem you're dealing with in your own team, you can see how I approach software delivery in practice.